Introduction: Why Drilling Acrylic Requires Special Techniques
Drilling holes in acrylic seems straightforward — after all, you just push a drill bit through the material, right? Unfortunately, this approach almost always ends in disaster. Standard drilling techniques designed for wood or metal will cause acrylic to crack, chip, melt, or develop spider-web fractures that can spread and cause catastrophic failure weeks or months later.
The challenge stems from two fundamental properties of acrylic. First, acrylic is brittle under point loads — the concentrated force of a standard drill tip creates stress concentrations that initiate cracks radiating outward from the hole. Second, acrylic is a thermoplastic — the friction from drilling generates heat that melts the acrylic, causing it to gum up the drill bit flutes, grab the bit, and crack the workpiece.
With the right drill bits, correct speed settings, proper support, and careful technique, however, you can drill clean, perfectly round holes in acrylic of any thickness without cracking or chipping. This guide provides everything you need to know, from bit selection to advanced techniques for large-diameter and deep holes.
Drill Bit Selection: The Most Important Factor
The type of drill bit you use is the single biggest factor in whether your holes come out clean or cracked. Standard twist drill bits — the ones in most toolkits — are designed for metal and have a sharp point angle (typically 118° or 135°) with aggressive cutting edges. These characteristics are exactly what you do NOT want for acrylic.
Specialized Acrylic Drill Bits (Best Option)
Acrylic drill bits (also called plastic drill bits or zero-rake bits) are specifically designed for thermoplastics. They feature:
- Flat or conical cutting tip: Instead of a sharp point, the tip is angled to scrape rather than gouge the material, distributing cutting forces over a wider area.
- Zero or negative rake angle: The cutting edges are angled to push material away from the hole rather than pulling the bit into the workpiece. This prevents the bit from grabbing and cracking the acrylic.
- Wide, polished flutes: Efficient chip clearance prevents clogging and heat buildup.
Brands like McMaster-Carr, OSG, and Amana Tool offer acrylic-specific drill bits. They cost more than standard bits but are absolutely worth the investment for anyone working with acrylic regularly.
Modified Standard Drill Bits (Budget Option)
If you do not have access to specialized acrylic bits, you can modify standard metal drill bits with a bench grinder:
- Grind the cutting edge flat — remove the sharp cutting lip and create a flat scraping surface with a slight negative rake angle.
- Reduce the point angle — grind the tip to a broader angle (150°) to spread the cutting force.
- Polish the flutes — use a honing stone to smooth the inside of the flutes for better chip clearance.
This modification takes practice but produces serviceable results. Always practice on scrap acrylic before drilling your actual workpiece.
Countersink Bits for Large Holes
For holes larger than 1/2″ (12mm), use a step-drill bit or hole saw with an acrylic-specific pilot bit. Standard hole saws grab aggressively and can crack the acrylic. Step drill bits are the best choice because they cut incrementally, removing small amounts of material at each step.

Speed Settings: RPM Matters
Drill speed is critical for acrylic. Too fast generates excessive heat; too slow causes the bit to grab and crack the material. The correct speed depends on the hole diameter:
| Hole Diameter | Recommended RPM | Feed Rate |
|---|---|---|
| 1/16″ (1.5mm) | 3,000-4,000 RPM | Very light pressure |
| 1/8″ (3mm) | 2,000-3,000 RPM | Light pressure |
| 1/4″ (6mm) | 1,500-2,000 RPM | Gentle, steady pressure |
| 3/8″ (10mm) | 1,000-1,500 RPM | Gentle, steady pressure |
| 1/2″ (12mm) | 750-1,000 RPM | Very gentle pressure |
| 3/4″ (19mm) | 500-750 RPM | Minimal pressure |
| 1″ (25mm) | 300-500 RPM | Minimal pressure |
General rule: Larger holes require slower speeds. If you see melting, discoloration, or the bit gumming up, reduce speed immediately.
Drill Press vs. Hand Drill
A drill press is strongly recommended for acrylic drilling. It provides consistent, perpendicular pressure and precise speed control that is difficult to achieve with a hand drill. If you must use a hand drill, brace the workpiece firmly, go slowly, and accept that results will be less consistent.
Support Methods: Preventing Breakout and Cracking
The most common cause of cracking during acrylic drilling is inadequate support. Without proper backing, the drill bit exits the bottom of the acrylic and the material breaks out unevenly, creating a star-shaped crack pattern.
The Wood Block Backing Method
This is the single most important technique for clean acrylic drilling:
- Place a scrap piece of wood (plywood, MDF, or softwood) under the acrylic sheet at the drilling location.
- Clamp the acrylic and wood together firmly — any movement during drilling will cause cracking.
- Drill through the acrylic into the wood. The wood supports the acrylic as the bit exits, preventing breakout.
This simple technique eliminates 90% of drilling-related cracking problems.
Supporting Large Sheets
For large acrylic sheets, support the entire panel to prevent flexing and vibration during drilling:
- Place the sheet on a flat, rigid surface (workbench or table)
- Use foam padding or rubber mats between the acrylic and the work surface to prevent scratches
- Clamp the sheet at multiple points around the drilling area
- Ensure the backing block extends at least 1″ beyond the hole location in every direction
Drilling Technique: Step-by-Step Process
- Mark the hole location with a fine-tip marker. Use a center punch or awl to create a small indentation — but tap very gently to avoid cracking the surface.
- Position the backing block under the acrylic and clamp both securely.
- Set the correct drill speed based on the hole diameter chart above.
- Start the drill and position the bit at the marked location. Apply gentle pressure to establish the starting point.
- Drill slowly and steadily — let the bit cut at its own pace. Apply consistent, light pressure. Never force the bit.
- Use the peck-drilling technique for holes deeper than 1/4″ (6mm): drill partially through, back the bit out to clear chips, then continue. This prevents heat buildup and chip clogging.
- Reduce pressure as the bit approaches the exit side — this is where breakout occurs. Let the bit cut through the last 1/16″ with minimal force.
- Back the bit out slowly after completing the hole. Do not pull it out quickly, as this can chip the exit edge.
Deburring and Finishing Drilled Holes
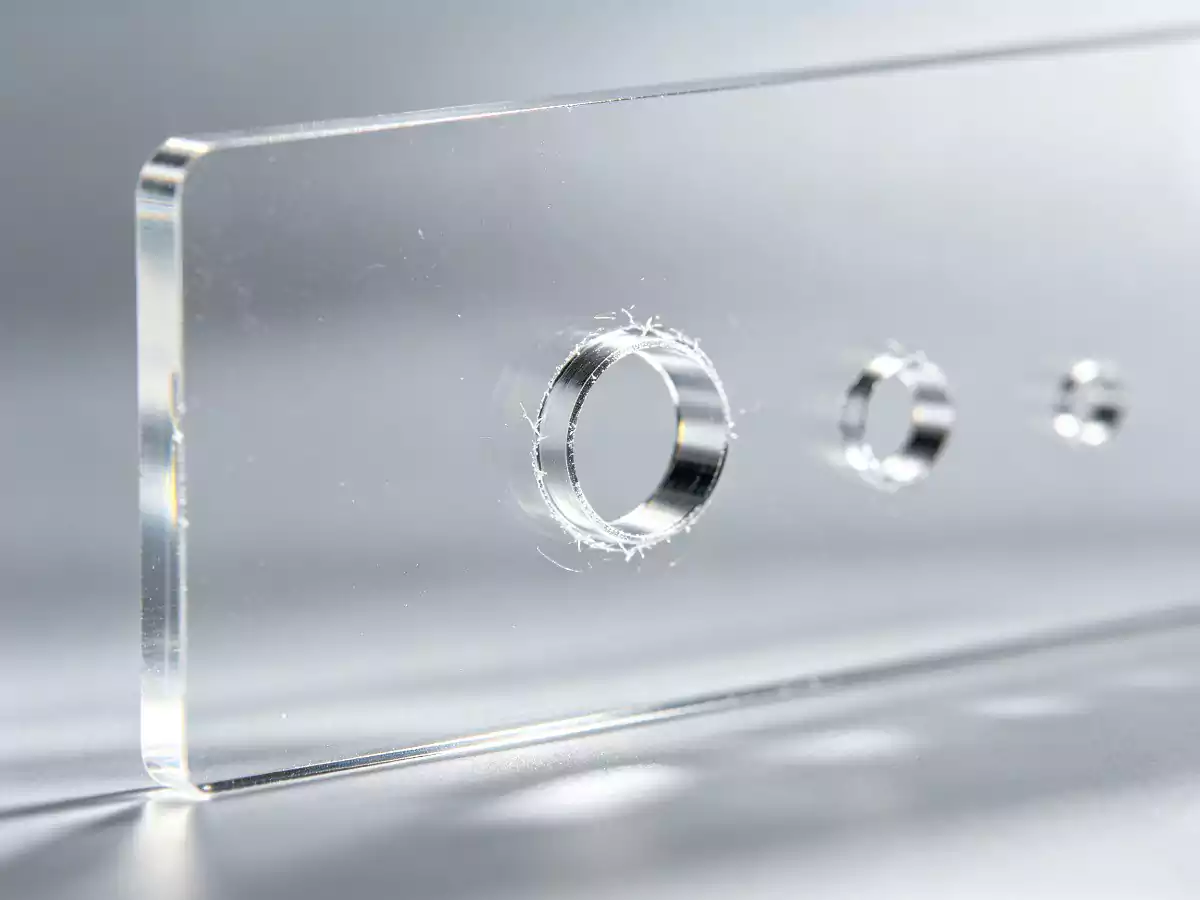
After drilling, the hole edges will have slight burrs and roughness. Proper deburring prevents stress concentration at the hole edge and gives a professional appearance:
- Countersink the edges: Use a countersink bit or a larger drill bit spun by hand to chamfer both sides of the hole. This removes burrs and reduces the risk of crack propagation.
- Light sanding: Wrap 400-grit sandpaper around a small dowel and sand the inside of the hole with a twisting motion.
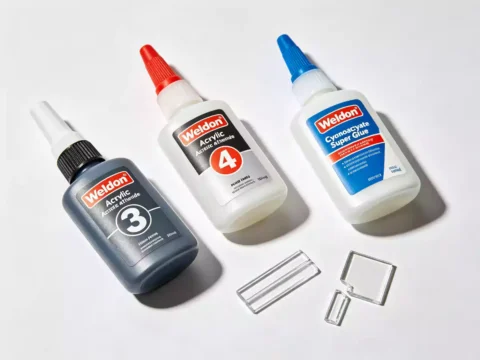
- Chemical smoothing: Apply a small amount of Weldon #4 to the hole edges with a cotton swab. The solvent will smooth micro-burrs and create a polished edge.
Common Mistakes and Solutions
| Mistake | Consequence | Solution |
|---|---|---|
| Using standard twist drill bits | Cracking, chipping, grabbing | Use acrylic-specific or modified bits with zero rake |
| Drilling at high RPM | Melting, gumming, discoloration | Reduce speed per diameter chart; use peck drilling |
| No backing support | Star-shaped breakout cracks | Always use wood backing block clamped behind the acrylic |
| Applying too much pressure | Cracking, bit grabbing | Use gentle, consistent pressure; let the bit cut at its own pace |
| Not using peck drilling for deep holes | Heat buildup, chip clogging, melting | Drill in stages, backing out to clear chips every 1/8″ |
| Removing bit too quickly | Chipping at exit edge | Back the bit out slowly after completing the hole |

Special Techniques for Challenging Drilling Scenarios
Drilling Very Large Holes (1″+ / 25mm+)
For large-diameter holes, use a step drill bit and drill incrementally. Alternatively, rough-cut the hole with a hole saw (using very low speed and steady pressure), then finish with a drum sander or file to the exact diameter. Always use a backing block and clamp securely.
Drilling Near Edges
Drilling within 1/2″ of an edge significantly increases cracking risk. Use a sacrificial backup strip clamped to the edge, drill at the slowest speed, and apply minimal pressure. Consider using a smaller pilot hole first, then enlarging incrementally.
Drilling Through Multiple Layers
When drilling through stacked acrylic sheets, clamp all layers together with the backing block and drill as if through a single thick piece. Use the peck-drilling technique and go slowly.
Conclusion: Patience and the Right Tools Prevent Cracking
Drilling acrylic without cracking is entirely achievable when you use the correct drill bits, appropriate speeds, proper support, and patient technique. The key takeaways are: use acrylic-specific bits, slow down, back the workpiece, drill in stages, and never force the bit. With these principles in mind, you can drill clean, professional holes in acrylic of any thickness.
For more acrylic fabrication techniques, including cutting, gluing, bending, and polishing, explore The Complete Guide to Acrylic Sheet Fabrication.

Frequently Asked Questions
What kind of drill bit do you use for acrylic?
Use specialized acrylic drill bits (also called plastic drill bits or zero-rake bits) with a flat scraping tip and zero rake angle. If these are unavailable, modify standard metal bits by grinding the cutting edges flat. Never use standard sharp-point twist bits, which cause cracking.
How do you drill acrylic without cracking it?
Use an acrylic-specific drill bit at low RPM (500-2,000 depending on hole size), back the acrylic with a wood block, apply gentle consistent pressure, use the peck-drilling technique for deep holes, and reduce pressure as the bit exits the bottom surface.
Can you drill acrylic with a regular drill?
Yes, but a drill press is strongly recommended for consistent pressure and speed control. If using a hand drill, clamp the workpiece firmly, use the slowest speed setting, and brace yourself carefully to maintain perpendicular alignment.
Why does acrylic crack when drilling?
Acrylic cracks due to concentrated point loads from sharp drill bits, excessive heat from high RPM, and breakout forces when the bit exits the material without backing support. Using the correct bit type, speed, and support eliminates these issues.
How do you drill a large hole in acrylic?
For holes larger than 1/2″, use a step drill bit that cuts incrementally. Alternatively, use a hole saw at very low speed with a backing block, then finish with a drum sander. Always clamp securely and go slowly.