What Is an Acrylic Light Box? Understanding Illuminated Signage
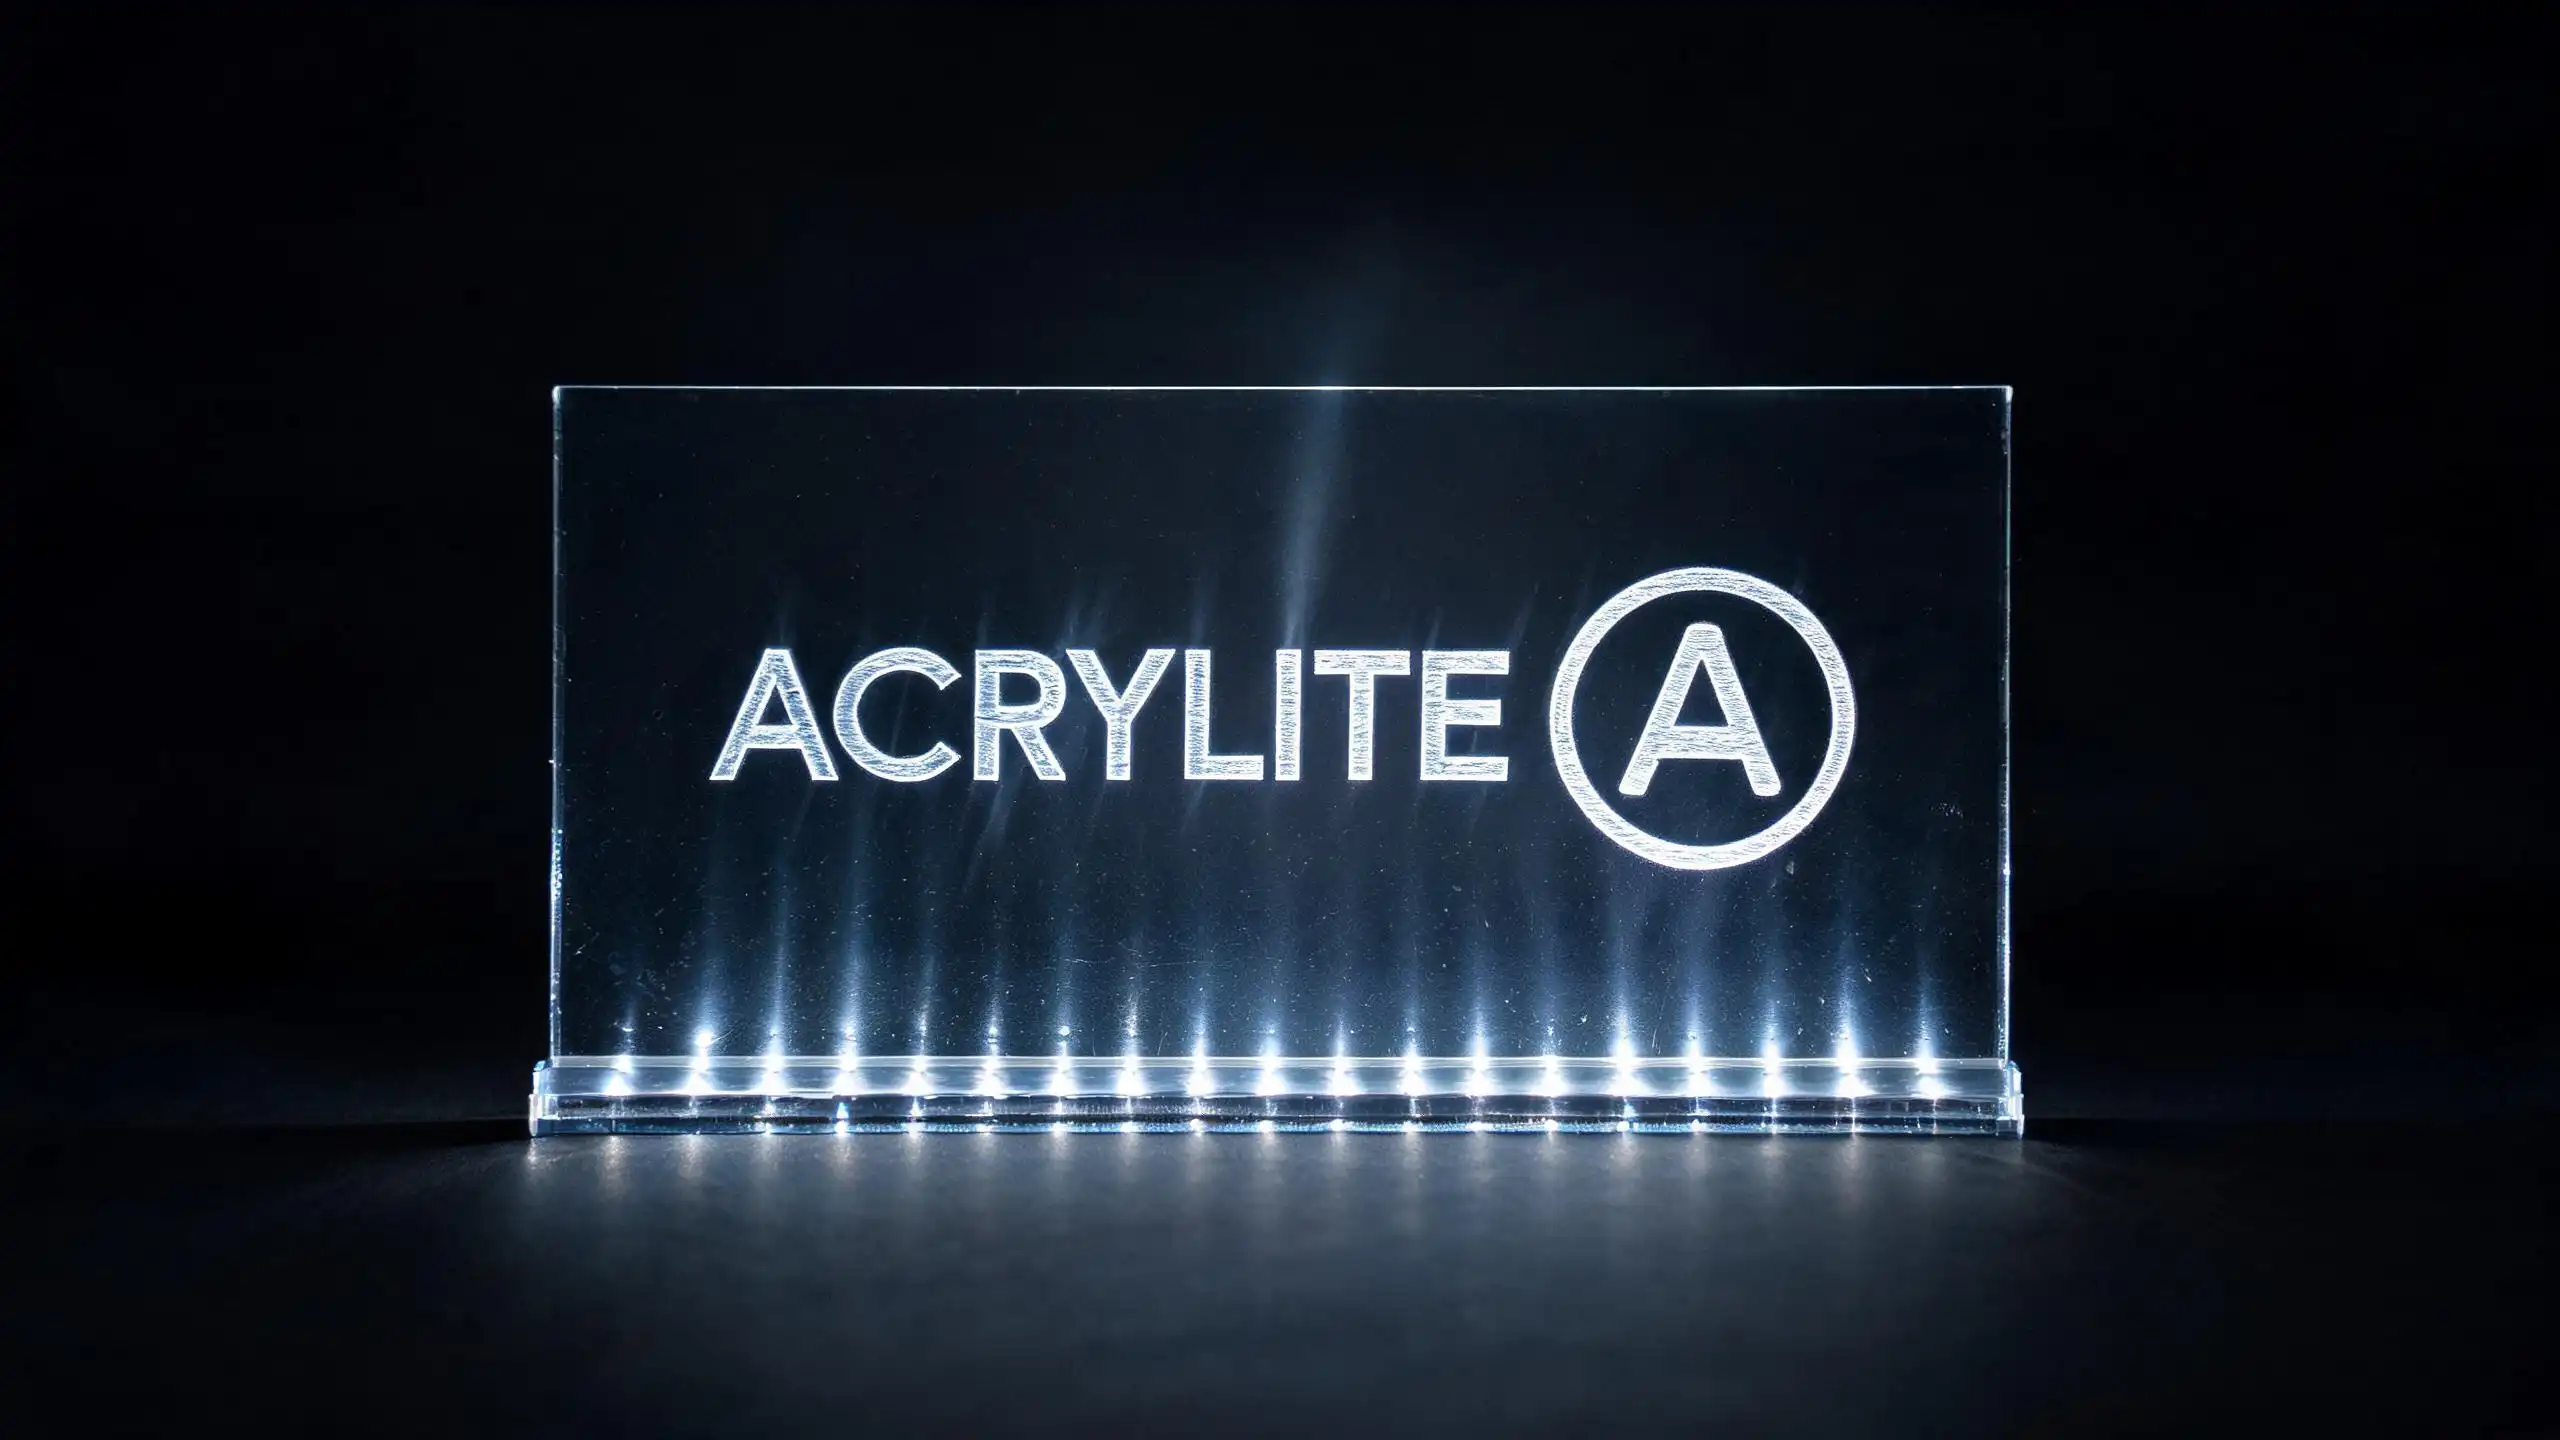
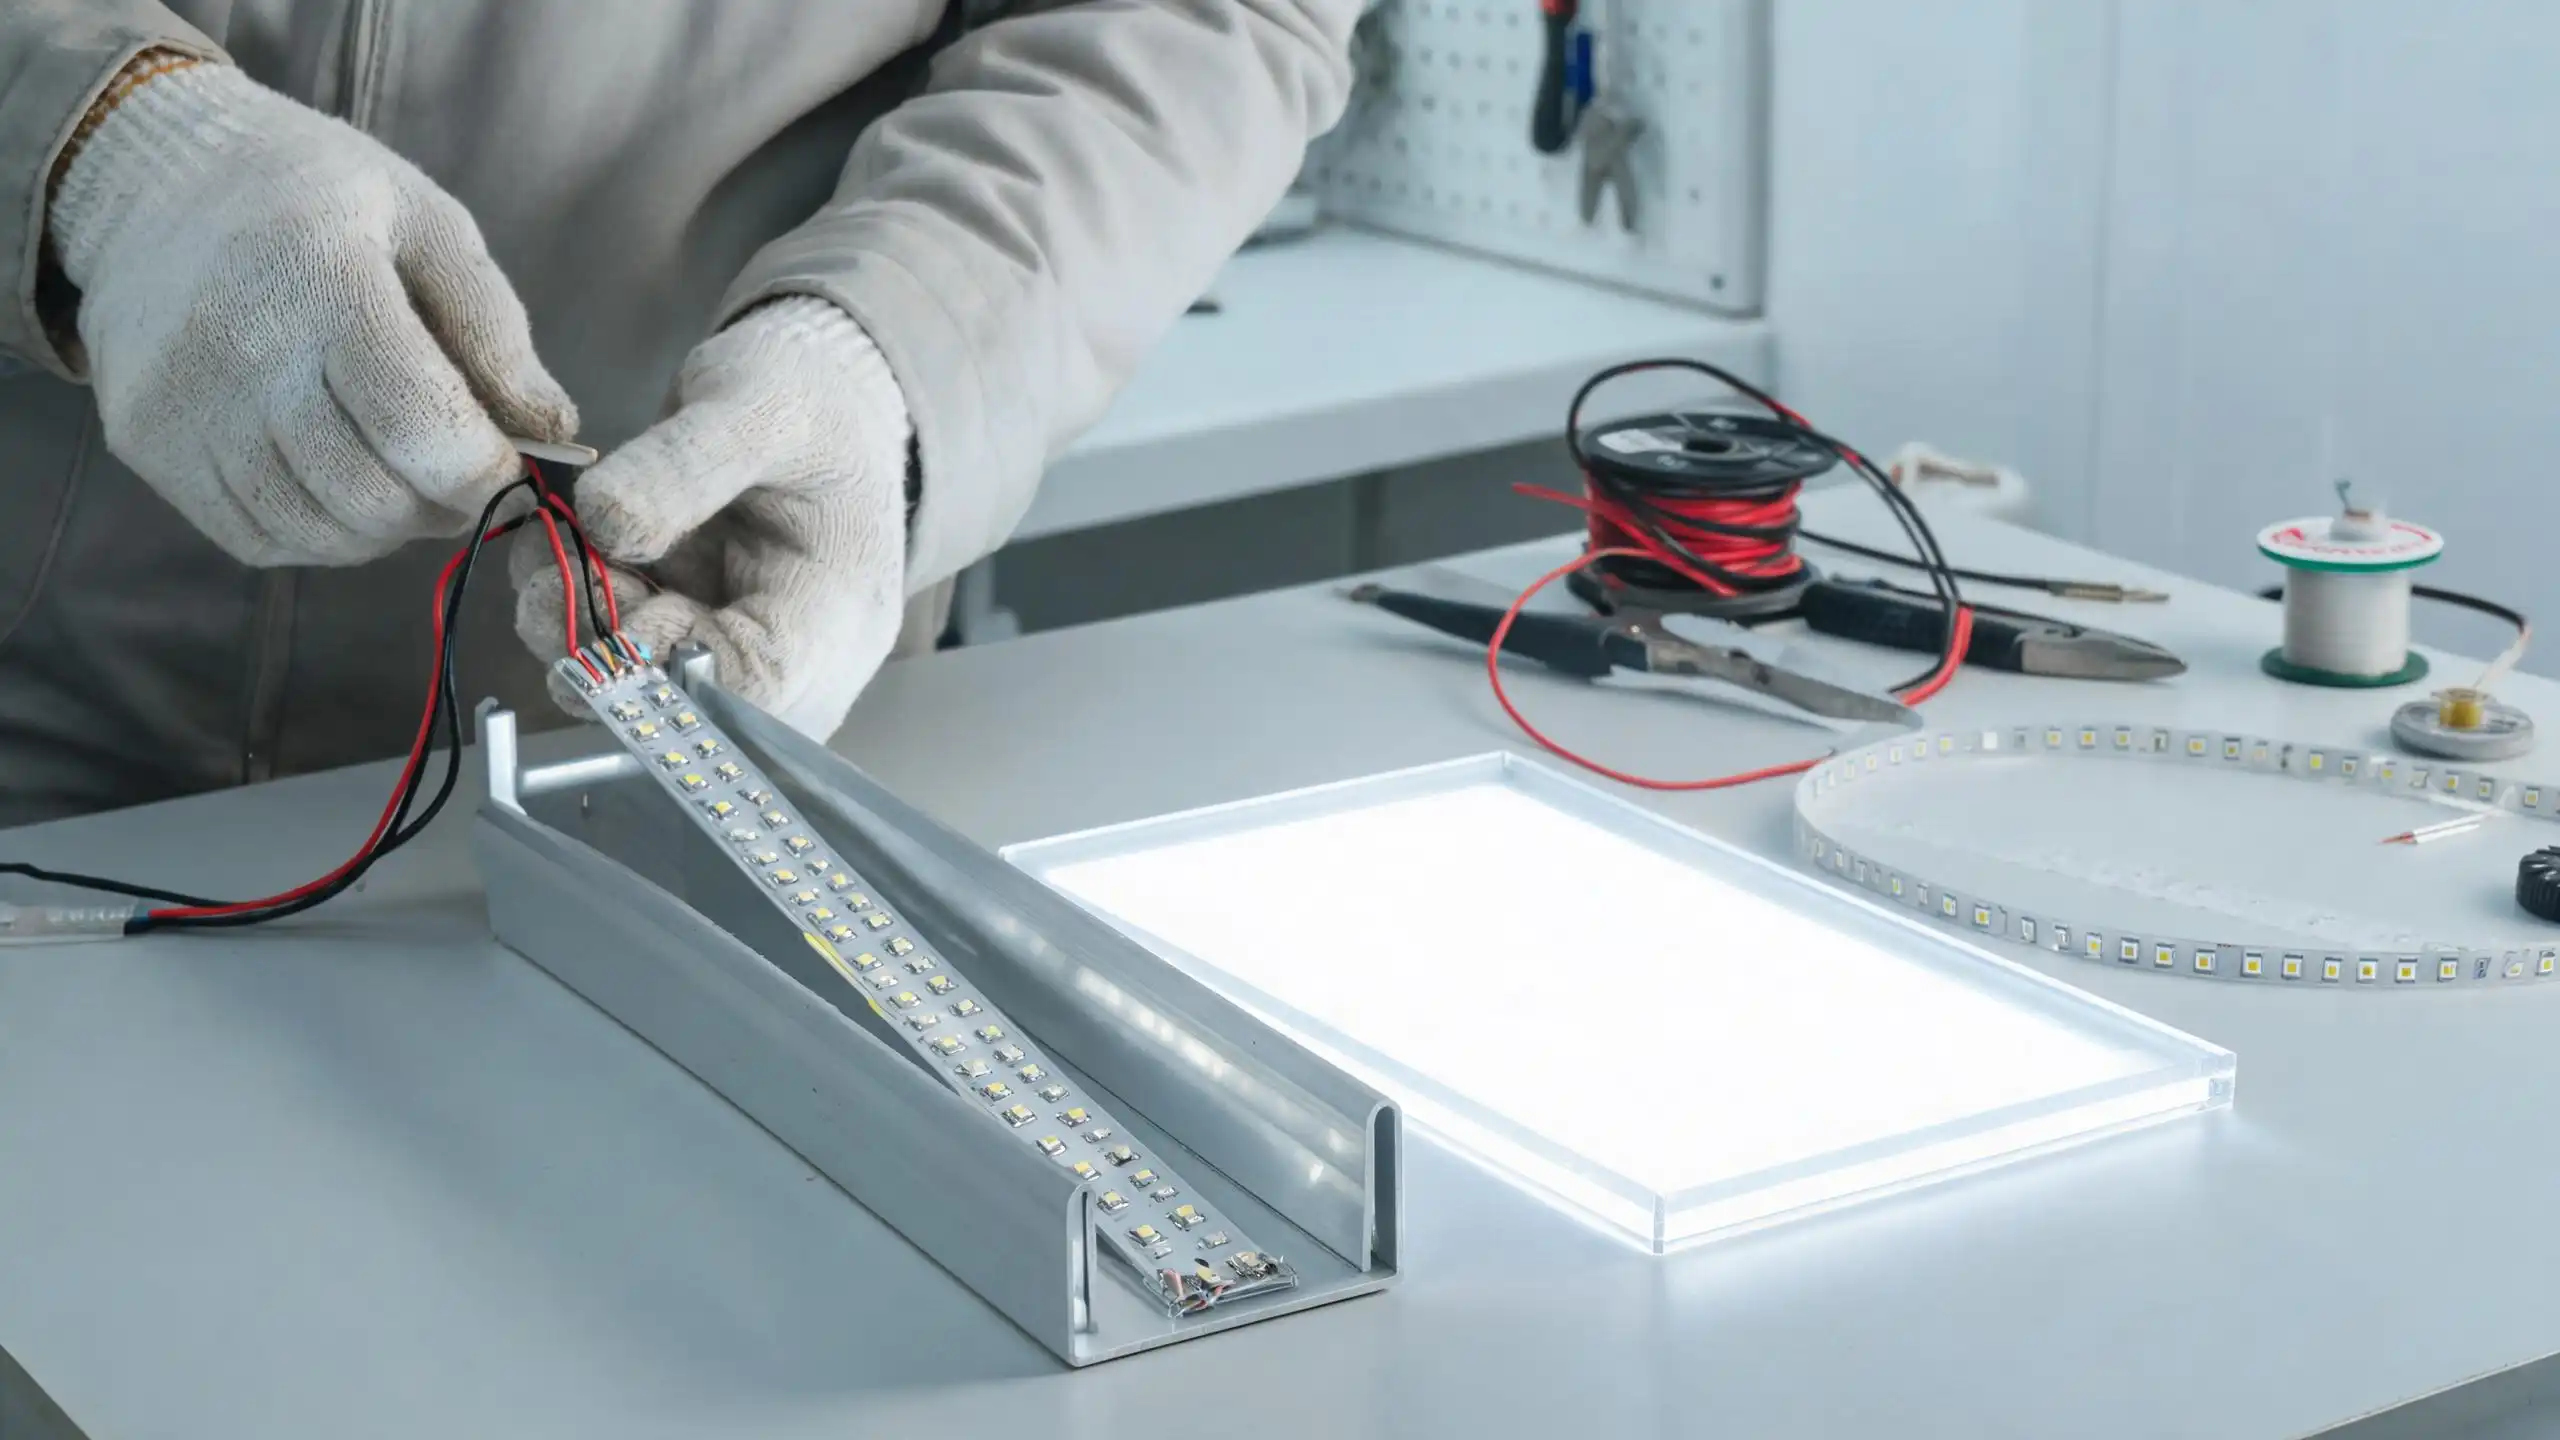
At its core, an acrylic light box is a self-contained illuminated sign system composed of three primary elements: an acrylic panel that serves as the light-transmitting surface, an LED light source that provides illumination, and a frame or housing that holds the components together and manages wiring Read more in our acrylic business signs guide. The acrylic panel can be clear, frosted, opal, or color-tinted, and it may carry printed graphics, laser-engraved patterns, or applied vinyl lettering. The LED components are strategically positioned to push light through the acrylic in a controlled, even fashion, creating a sign that is visible in daylight, at night, and in environments with competing ambient light.
What distinguishes an acrylic light box from a conventional printed sign is the active illumination. A printed acrylic sign relies on reflected light — ambient light bounces off the surface so the viewer can read it. An LED acrylic light box, by contrast, generates its own light, making it visible in far more challenging conditions. This self-illumination is what makes these signs indispensable for storefronts, dark restaurant interiors, nighttime event spaces, and any environment where visibility cannot be left to chance.
How LED Light Boxes Work: Edge-Lit vs Backlit vs Front-Lit
There are three fundamental illumination architectures for acrylic light boxes, and the choice among them drives nearly every subsequent design and fabrication decision: Learn more about acrylic fabrication.
- Edge-lit (side-lit): LED strips are mounted along one or more edges of a clear acrylic panel. The light enters the panel through its edge and travels through the material by total internal reflection. When the light encounters a laser-engraved pattern, a frosted area, or a printed element on the panel surface, it scatters and becomes visible to the viewer. This architecture produces extremely thin, sleek signs — often under 12mm total thickness — and is ideal for directional signs, logos, and any application where a slim profile matters.
- Backlit (rear-lit): An array of LEDs is positioned behind a translucent or opal acrylic panel, pushing light through the entire surface. This approach produces bright, even illumination across the whole sign face and is the standard choice for large-format menu boards, lightbox billboards, and any sign where full-surface brightness and color consistency are paramount. Backlit signs require more depth (typically 75mm to 150mm) to house the LED array and maintain even light distribution.
- Front-lit: LEDs are mounted in front of the acrylic panel, illuminating it from the viewer’s side. This is less common for acrylic light boxes specifically but appears in hybrid sign systems where the acrylic serves as a structural or decorative element rather than the primary light-guiding medium. Front-lit configurations are typically used in channel letter systems where acrylic faces are lit from within individual letter housings.
Understanding these three architectures is essential because each has different material requirements, depth profiles, brightness characteristics, and cost implications. A sign that looks perfect in a CAD rendering can perform poorly in the real world if the illumination strategy is mismatched to the application.
Why Acrylic — Not Glass — Is the Standard for Illuminated Signage
Acrylic (polymethyl methacrylate, or PMMA) has become the dominant material for illuminated signage for several compelling reasons. First, acrylic transmits up to 92% of visible light, a figure that rivals optical glass. This high light transmission means that LEDs can be driven at lower power levels while still producing a bright, vivid sign — reducing energy costs and extending component lifespan. Second, acrylic weighs roughly half as much as a comparable glass panel, which simplifies mounting, shipping, and installation, especially for large-format signs mounted to glass storefronts or suspended ceilings. Third, acrylic is shatter-resistant; if it breaks, it tends to crack into larger, duller pieces rather than shattering into dangerous shards, an important safety consideration for retail and public spaces. Finally, acrylic is highly formable — it can be laser cut, CNC routed, heat-bent, thermoformed, and laser-engraved with precision, giving designers extraordinary freedom to create complex shapes, integrated light-guiding patterns, and custom frame geometries that would be impractical or impossible with glass.
For a deeper comparison of acrylic against other transparent materials commonly considered for signage, see our guide on acrylic vs polycarbonate, which breaks down the tradeoffs in impact resistance, optical clarity, and long-term UV stability Read more in our trade show signage guide.
| Feature | Edge-Lit | Backlit | Front-Lit |
|---|---|---|---|
| Panel Thickness | 5mm–12mm (very slim) | 3mm–8mm (panel); 75mm–150mm (housing depth) | 5mm–10mm (panel); varies by housing |
| Light Distribution | Patterned — light appears at engraved/frosted areas | Even, full-surface glow | Direct illumination on surface |
| Brightness | Medium-High (concentrated at pattern) | High (full surface) | High (direct) |
| Best Use Case | Logos, directional signs, slim profiles | Menu boards, large-format displays, billboards | Channel letters, hybrid sign systems |
| Visibility in Bright Ambient Light | Good (high contrast at pattern) | Excellent (full-face brightness) | Good (depends on LED power) |
| Content Updatability | Low (engraving is permanent) | High (overlays/inserts replaceable) | Medium |
Acrylic Materials for Light Box Construction
The acrylic material you choose for a light box panel is not a trivial decision — it directly affects light transmission, edge clarity, color rendering, durability, and overall sign performance. Two manufacturing processes and several visual finishes combine to create the material options available for light box fabrication.
Cast vs Extruded Acrylic for Light Boxes
Cast acrylic is manufactured by pouring liquid monomer between two glass plates and allowing it to polymerize. This process produces material with exceptional optical clarity, superior surface quality, and excellent edge finish — all critical for light box applications where light enters through the panel edge. Cast acrylic is available in a wide range of thicknesses (from 3mm to over 25mm) and colors, and it is the preferred choice for edge-lit signs because its edges can be polished to a near-perfect clarity that maximizes light coupling from the LED strip into the panel. Cast acrylic also laser cuts more cleanly than extruded, with minimal edge discoloration.
Extruded acrylic is produced by forcing softened acrylic through a die, resulting in a continuous sheet with consistent thickness but slightly lower optical quality than cast. Extruded acrylic is generally less expensive, available in longer continuous sheets, and easier to thermoform, but its edges tend to have more internal stress and slightly lower light transmission — which can create dim spots in edge-lit applications. For backlit signs where light passes through the face rather than the edge, extruded acrylic performs adequately and is a reasonable choice for budget-sensitive large-format projects.
Clear vs Opal vs Frosted Acrylic
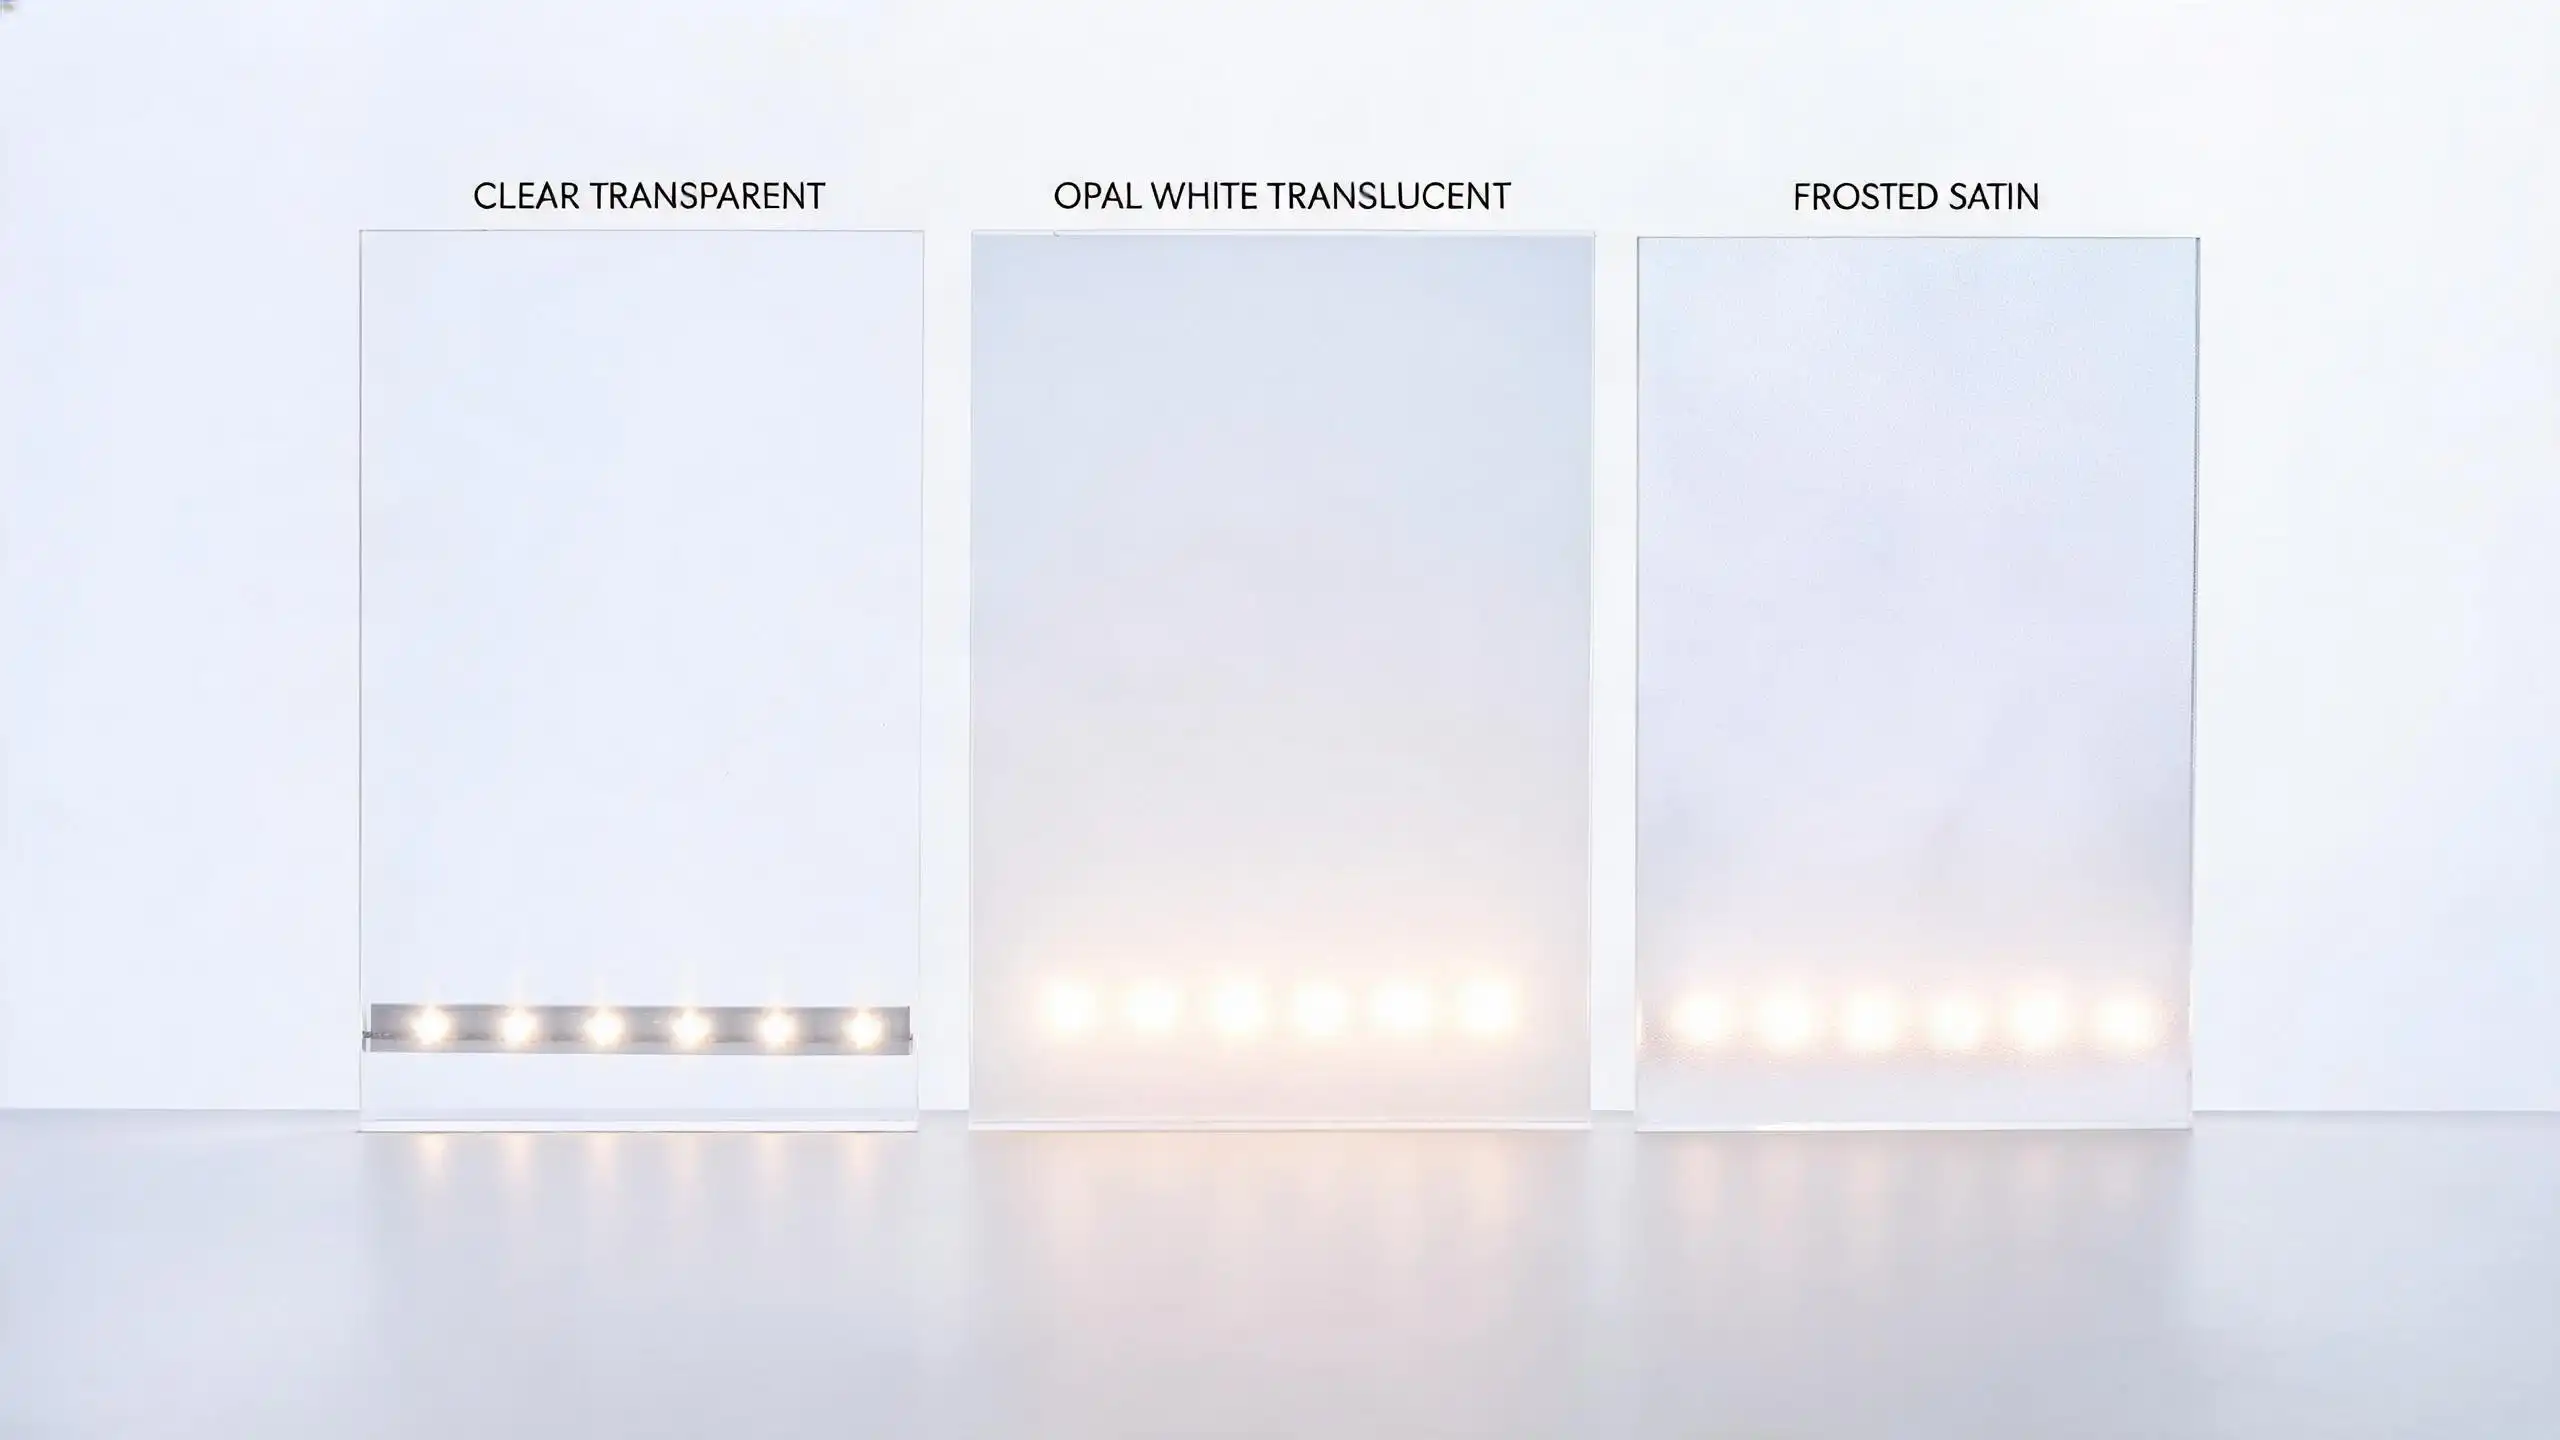
The visual finish of the acrylic panel determines how light behaves when it reaches the surface:
- Clear acrylic transmits light with minimal diffusion. It is the standard choice for edge-lit signs, where the panel acts as a light guide and the illumination is controlled by engraved or frosted patterns on the surface. Clear acrylic is also used in backlit signs where a printed vinyl or direct-print overlay provides the visible content and the acrylic simply serves as a rigid, stable substrate.
- Opal (white translucent) acrylic diffuses light evenly across its surface. It is the go-to material for backlit signs because it eliminates hotspots and creates a smooth, uniform glow that makes printed or applied content highly legible. Opal acrylic is available in varying levels of translucency — more opaque grades produce softer, more even light but require more LED power to achieve the same brightness.
- Frosted acrylic has a satin surface treatment that scatters light at the surface. It is often used as a back panel behind edge-lit individual letters or logos, providing a subtle ambient glow that contrasts with the bright, focused light of the edge-lit elements. Frosted acrylic is also used for privacy partitions in office settings where a diffused, non-directional light quality is desired.
Thickness Selection Guide
Panel thickness affects light distribution, structural rigidity, and the maximum sign size achievable without additional support framing. For a comprehensive breakdown of acrylic thickness options across applications, see our acrylic sheet thickness guide. The following covers the ranges most relevant to light box construction:
- 3mm: Suitable for small backlit panels (under 600mm x 600mm) where the panel is fully supported by a rigid frame. Not recommended for edge-lit applications — too thin for effective light guiding.
- 5mm: The workhorse thickness for backlit signs and the minimum practical thickness for edge-lit signs. Provides good rigidity for panels up to roughly 1m x 1m and adequate light guiding for edge-lit logos and directional signs.
- 8mm: The sweet spot for edge-lit signs with moderate engraving detail. Offers excellent light distribution, strong structural performance, and a substantial feel that reads as “premium” in lobby and corporate settings.
- 10mm–12mm: Used for larger edge-lit panels (over 1m), signs with extensive engraving patterns, and applications where the acrylic panel is freestanding or minimally framed. Thicker panels guide light farther from the source, reducing dim areas on large signs.
- 15mm+: Reserved for very large edge-lit installations, thick block-style signs, and architectural light features where the acrylic itself is a visible design element with substantial depth.
At CustomAcrylicPro, we typically fabricate light box panels in 5mm to 15mm cast acrylic with laser-polished edges for optimal light transmission, matching the thickness to the sign size and illumination architecture rather than defaulting to a single dimension.
| Acrylic Type | Best Light Box Use Case | Light Diffusion Quality | Edge Quality for Light Guiding |
|---|---|---|---|
| Cast Clear | Edge-lit signs, engraved logos, directional signage | Low (controlled by surface pattern) | Excellent — polishable to optical clarity |
| Cast Opal | Premium backlit panels, menu boards, lobby signs | High — even, soft glow | Good |
| Extruded Clear | Backlit signs with printed overlays, budget large-format | Low | Fair — more internal stress, slight dimming |
| Extruded Opal | Large-format backlit signs, budget menu boards | Medium-High | Fair |
| Frosted (surface-treated) | Back panels behind edge-lit letters, ambient glow features | Medium — directional scatter at surface | Good |
LED Integration and Lighting Design
The LED system is the engine of an acrylic light box. Selecting the right LED type, color temperature, and placement strategy determines whether the final sign is brilliant and uniform or dim and patchy. This section covers the key technical decisions in LED integration.
LED Strip Types for Acrylic Light Boxes
LED strips used in signage are classified by their chip type, which indicates the physical size and light output of each individual LED. The three most common types in acrylic light box applications are:
- SMD3528: Each chip measures 3.5mm x 2.8mm. These are lower-output LEDs typically used in edge-lit signs where the light enters the panel edge and needs only moderate brightness to create a visible glow at the engraved pattern. SMD3528 strips consume less power and produce less heat, making them ideal for slim, enclosed light boxes with limited ventilation.
- SMD5050: Each chip measures 5.0mm x 5.0mm — significantly larger and brighter than SMD3528. SMD5050 strips are the most versatile choice, used in both edge-lit and backlit applications. They produce enough light for medium-to-large backlit panels and can also serve as high-brightness edge sources for thicker acrylic panels. Many SMD5050 strips are also available in RGB configurations for color-changing signage.
- SMD5630 (and similar high-output variants): These chips produce the highest light output of the common signage-grade strips. They are used in backlit signs that must compete with bright ambient light — outdoor-rated light boxes, signs in skylit atriums, and large menu boards in sunlit quick-service restaurant environments. The tradeoff is higher power consumption and greater heat output, which must be managed through proper housing design and ventilation.
Color Temperature Guide
LED color temperature, measured in Kelvin (K), has a significant impact on how a sign is perceived and how accurately it renders brand colors:
- Warm white (2700K–3000K): Produces a soft, golden-white light that reads as inviting and premium. Ideal for corporate lobbies, upscale retail, hospitality environments, and any setting where the sign should feel warm rather than clinical. Warm white is also the most flattering for skin tones, which matters in restaurant and hospitality signage.
- Neutral white (4000K): A balanced white that sits between warm and cool. Neutral white is the most versatile choice for general-purpose signage — it renders colors accurately without feeling warm or harsh. Many retail environments standardize on neutral white across their signage systems for consistency.
- Cool white (6000K–6500K): Produces a crisp, bluish-white light that reads as modern, energetic, and high-contrast. Cool white is the strongest choice for signs that must compete with bright ambient light — mall storefronts, outdoor-rated light boxes, and trade show environments where maximum visibility is the priority. However, cool white can feel harsh in intimate settings and may slightly skew color perception of printed graphics.
RGB and Color-Changing Options
For dynamic signage — event branding, entertainment venues, retail campaigns with seasonal color themes — RGB LED strips offer the ability to change the sign’s color on demand. Modern RGBW strips (red, green, blue, plus a dedicated white LED) provide both color-changing capability and high-quality white light for when the sign needs to function in a standard mode. RGB systems require a controller, which can be a simple handheld remote, a programmable DMX controller for synchronized multi-sign installations, or a smartphone-controlled unit with scheduling capabilities. The key consideration with RGB signage is that color-changing effects, while eye-catching, can detract from legibility — they are best used for ambient or decorative elements rather than primary wayfinding or informational content.
LED Placement Strategies
The physical placement of LED strips within the light box housing is as important as the strip type itself. For edge-lit signs, strips are mounted in a channel routed along one or more edges of the acrylic panel. The channel must be precisely sized — too loose and light leaks reduce coupling efficiency; too tight and thermal expansion can stress the panel. Single-edge mounting (typically bottom or left side) is simplest but can create a brightness gradient across large panels. Multi-edge mounting (two or four sides) produces more even light distribution at the cost of more complex wiring.
For backlit signs, LED strips are arranged in a grid or linear array behind the panel, with spacing determined by the distance between the LEDs and the acrylic face. A common rule of thumb is that LED spacing should be roughly equal to the distance from the LEDs to the panel face — closer spacing for more even light, wider spacing for efficiency. Backlit housings must also account for heat dissipation; without adequate ventilation or a heat-sinking design, LED strips in an enclosed housing can degrade prematurely.
Hybrid approaches — combining edge-lit and backlit elements — are used in premium installations where the sign has both a glowing edge and an illuminated face. These require careful balancing of two LED systems to avoid one washing out the other.
| LED Type | Lumens per Meter (typical) | Power Draw | Best Light Box Application |
|---|---|---|---|
| SMD3528 | 300–500 lm | Low (4–5 W/m) | Slim edge-lit signs, directional signage, small panels |
| SMD5050 | 800–1200 lm | Medium (7–15 W/m) | Medium backlit panels, edge-lit logos, RGB color-changing signs |
| SMD5630 | 1500–2200 lm | High (14–20 W/m) | Large backlit menu boards, outdoor-rated signs, high-ambient-light environments |
| RGBW (5050-based) | 800–1400 lm (white mode) | Medium (8–16 W/m) | Dynamic/seasonal signage, event branding, entertainment venues |
Power Consumption and Lifespan Considerations
Quality LED strips rated for signage applications typically have a rated lifespan of 50,000 hours or more — equivalent to over five years of continuous 24/7 operation, or roughly 17 years at 8 hours per day. This longevity makes LED-lit acrylic signs a low-maintenance investment compared to the fluorescent tubes they largely replaced in older light box designs. Power consumption is also dramatically lower: a typical 1m x 0.5m edge-lit acrylic sign may draw as little as 10–15 watts, while a comparable backlit panel might draw 30–60 watts. Over years of operation, the energy savings alone can be substantial, but the more significant cost benefit is in reduced maintenance — no bulb changes, no ballast failures, and no service calls to swap out burnt-out tubes.
Real-World Applications: Industry Scenarios
Technical specifications matter most when applied to real business problems. The following four scenarios illustrate how acrylic light box design decisions play out in specific industry contexts — each with distinct challenges, constraints, and optimal solutions.
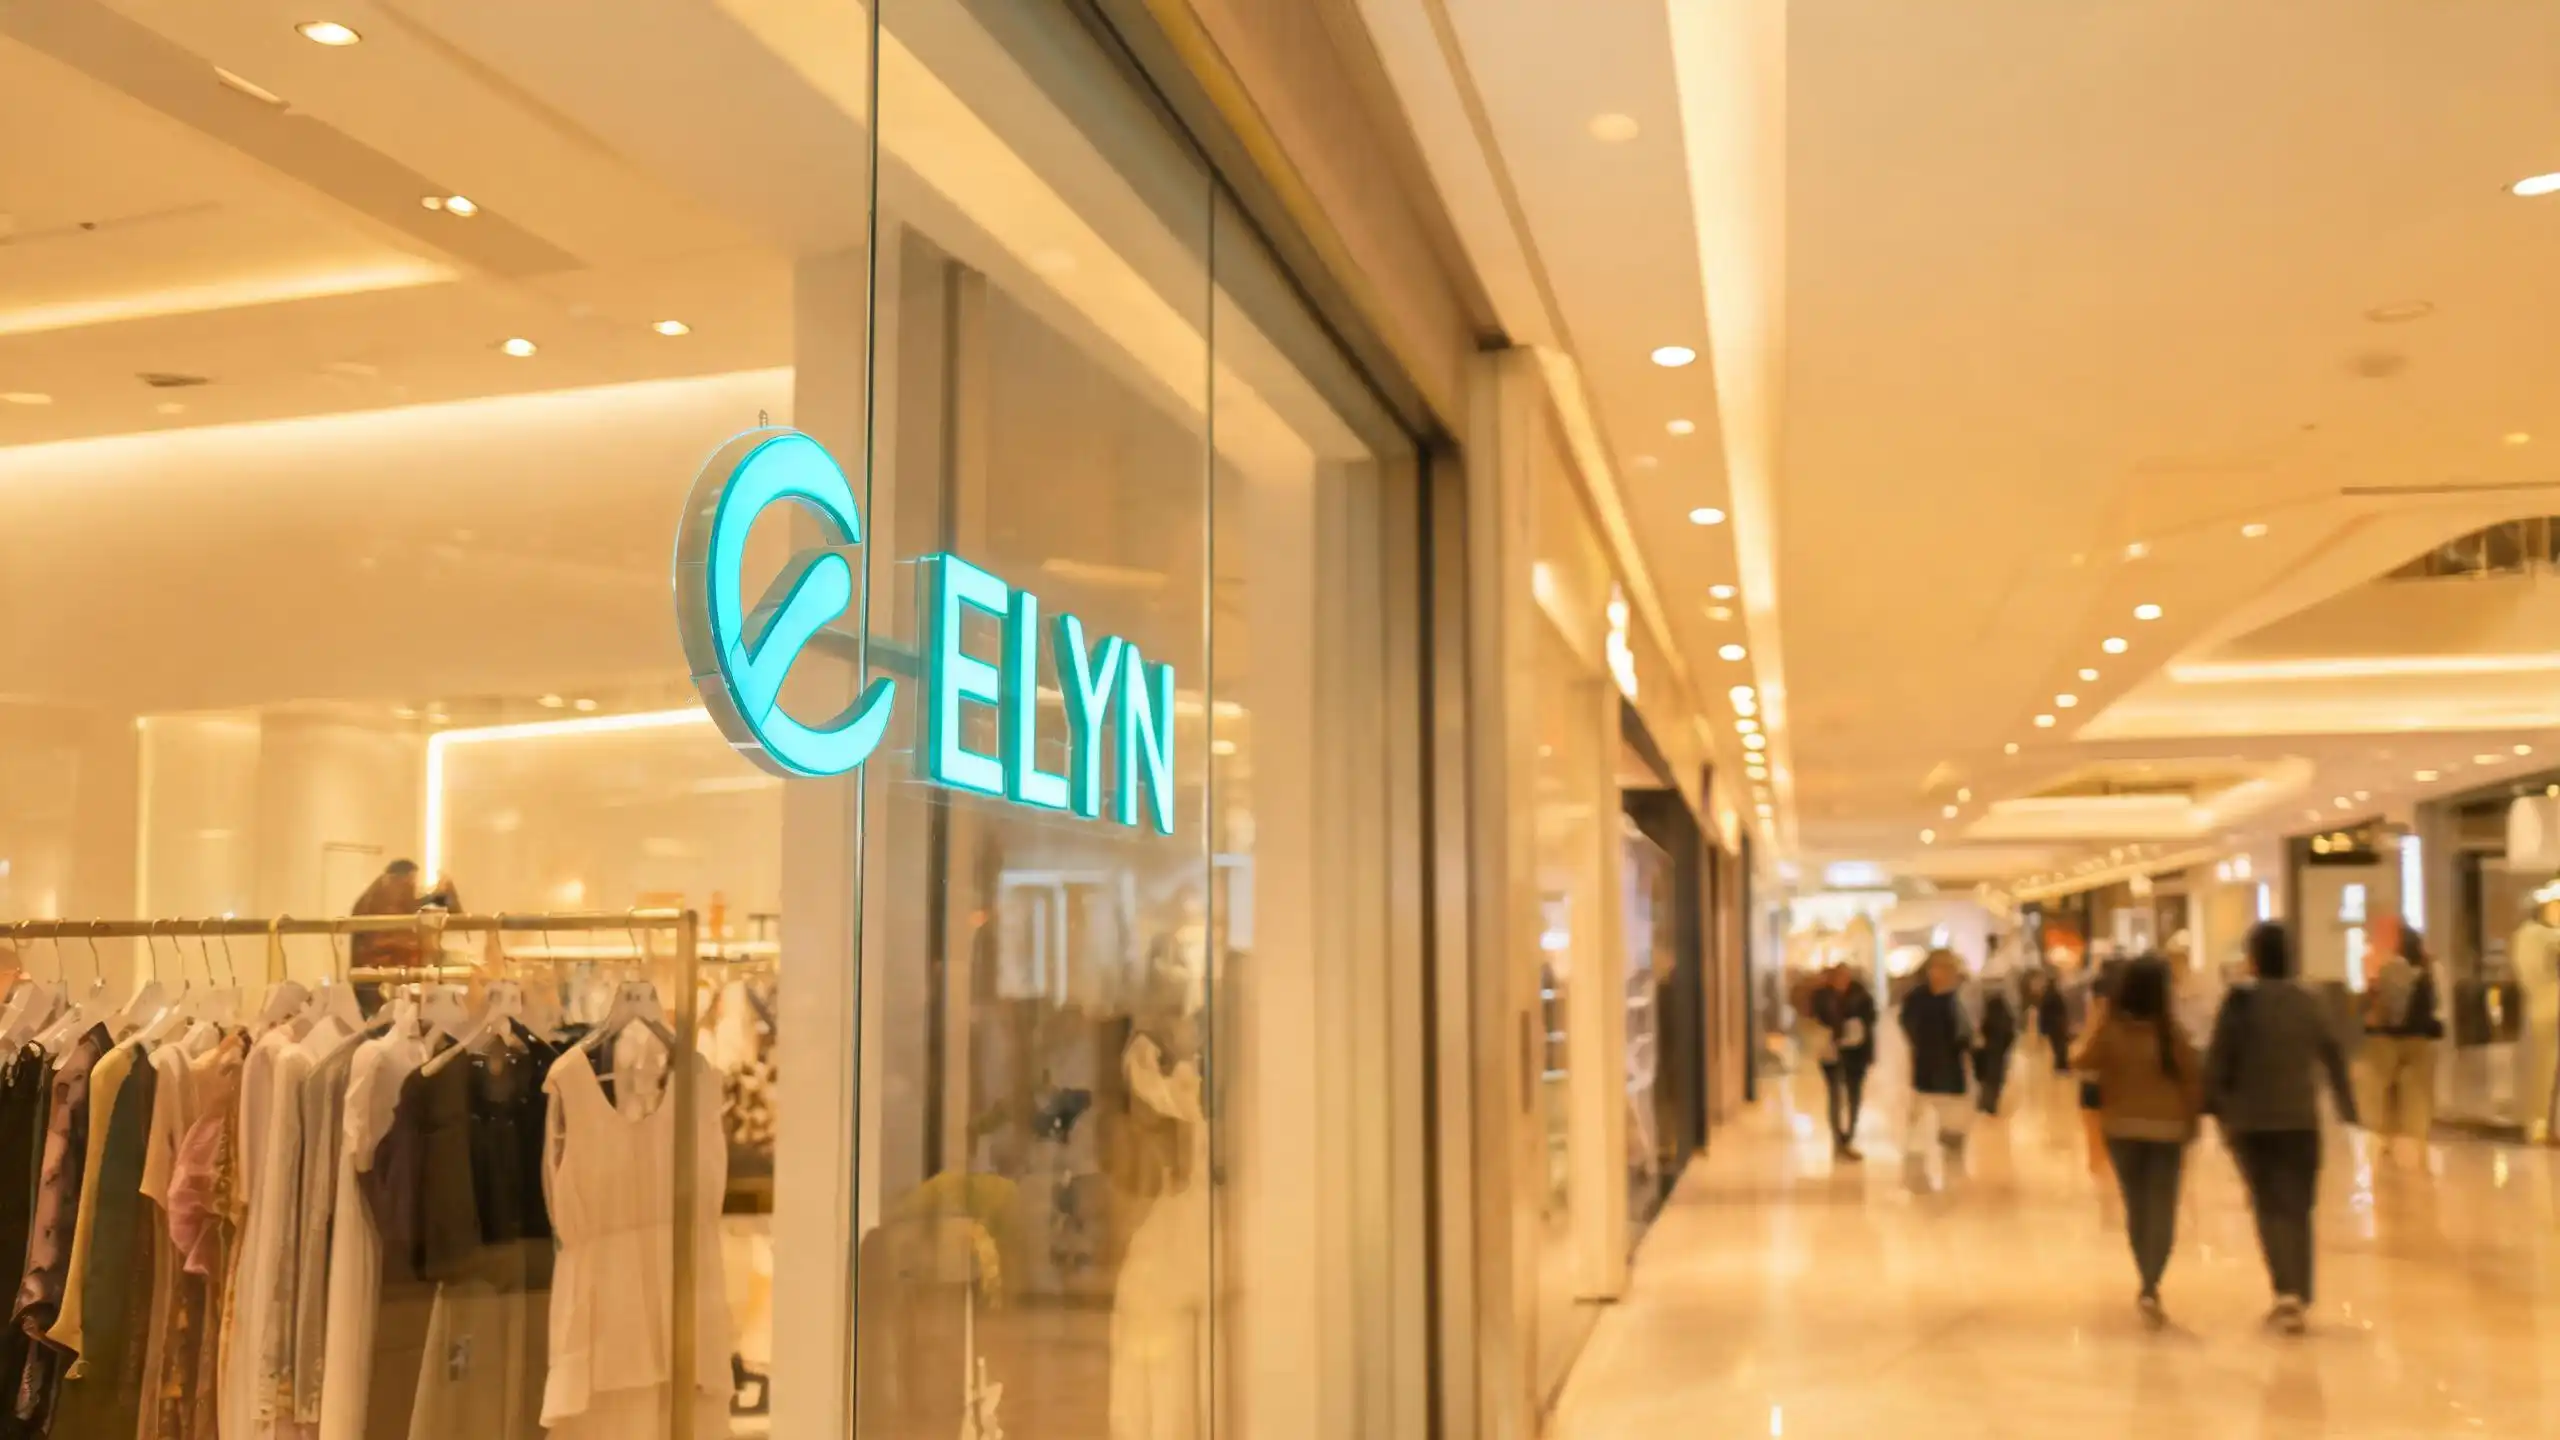
Scenario 1: Retail Storefront — Boutique Clothing in a Shopping Mall
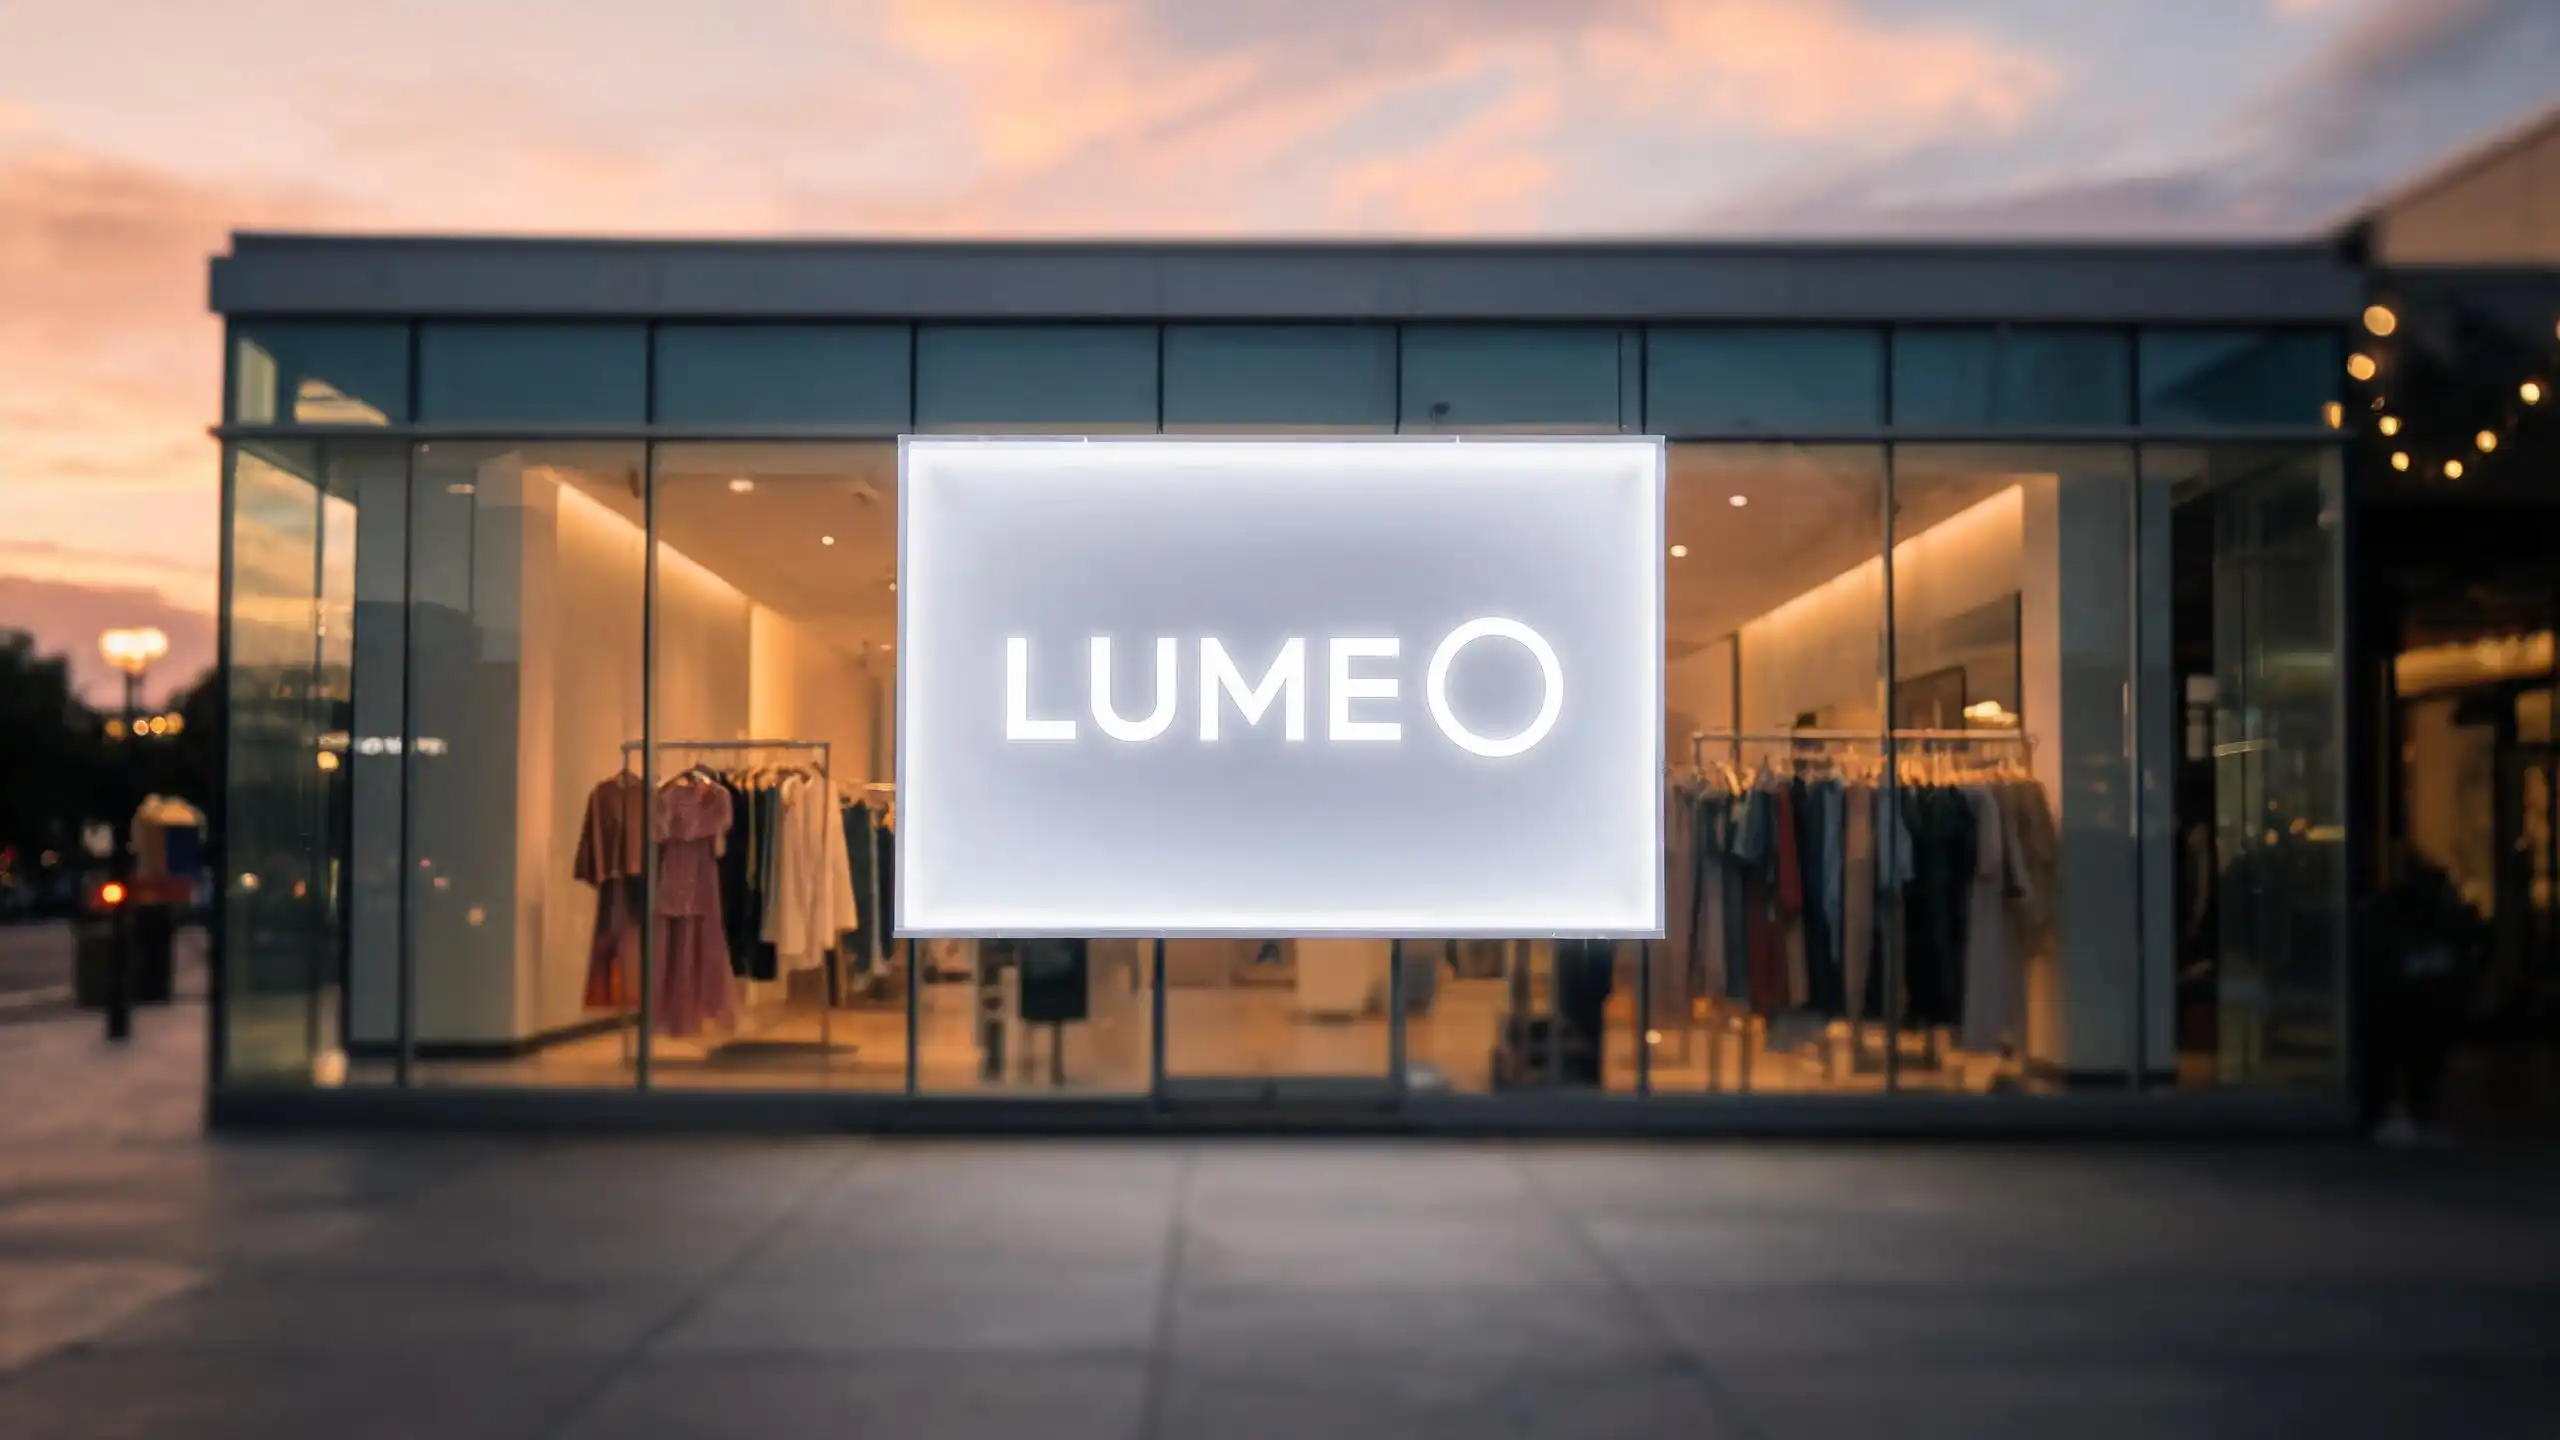
Setting: A boutique clothing retailer occupies a storefront in a busy regional shopping mall. The mall corridor is lit by bright overhead fluorescent and LED ceiling fixtures that produce roughly 500 lux of ambient light at the storefront glass. The retailer needs a window display sign — positioned behind the glass, facing the corridor — that is clearly readable from 50 feet away. The sign must mount directly to the interior surface of the glass window, must not protrude more than 25mm into the store (to avoid blocking the merchandising display behind it), and must reproduce the brand’s signature teal color with reasonable accuracy.
Challenge: The primary challenge is contrast. In a 500-lux corridor, a non-illuminated sign is nearly invisible — its reflected light is swamped by ambient illumination. The sign must be bright enough to “punch through” the ambient light and read as a distinct, attention-grabbing element. The glass mounting constraint eliminates any sign with significant depth, ruling out conventional backlit housings. The brand color requirement adds another layer: teal is a color that can shift dramatically under different LED color temperatures, and an overly warm or cool light source will make the brand teal look muddy or washed out.
Options: Three approaches were on the table. An edge-lit thin panel would meet the depth constraint (under 12mm total) and provide high brightness at the engraved pattern, but it would illuminate only the engraved areas, not a full-color brand mark. A backlit thick panel would provide full-surface illumination and color accuracy, but at 75mm+ depth it would violate the protrusion limit. A front-lit vinyl on clear acrylic — essentially a printed vinyl decal on a clear acrylic panel with no active illumination — would fail the visibility test entirely in the bright mall environment.
Solution: The optimal solution was an edge-lit 8mm clear cast acrylic panel with the brand logo laser-engraved into the surface. The engraving acts as a light-guiding feature: light from the edge-mounted LED strip travels through the clear panel via total internal reflection, and when it encounters the engraved pattern, it scatters and becomes visible as a bright, glowing logo. The LEDs were specified as cool white (6000K) SMD5050 strips, chosen for maximum brightness and contrast against the warm-toned mall lighting. The cool white also provides a neutral baseline that allows the engraved areas — which can be filled with translucent teal resin after engraving — to render the brand color with reasonable fidelity. The entire assembly, including the LED strip, driver, and a slim aluminum frame, came in at 14mm total depth, well within the 25mm constraint, and mounted to the glass with high-bond double-sided acrylic tape rated for the sign’s weight.
Scenario 2: Restaurant Menu Board — Fast-Casual Chain
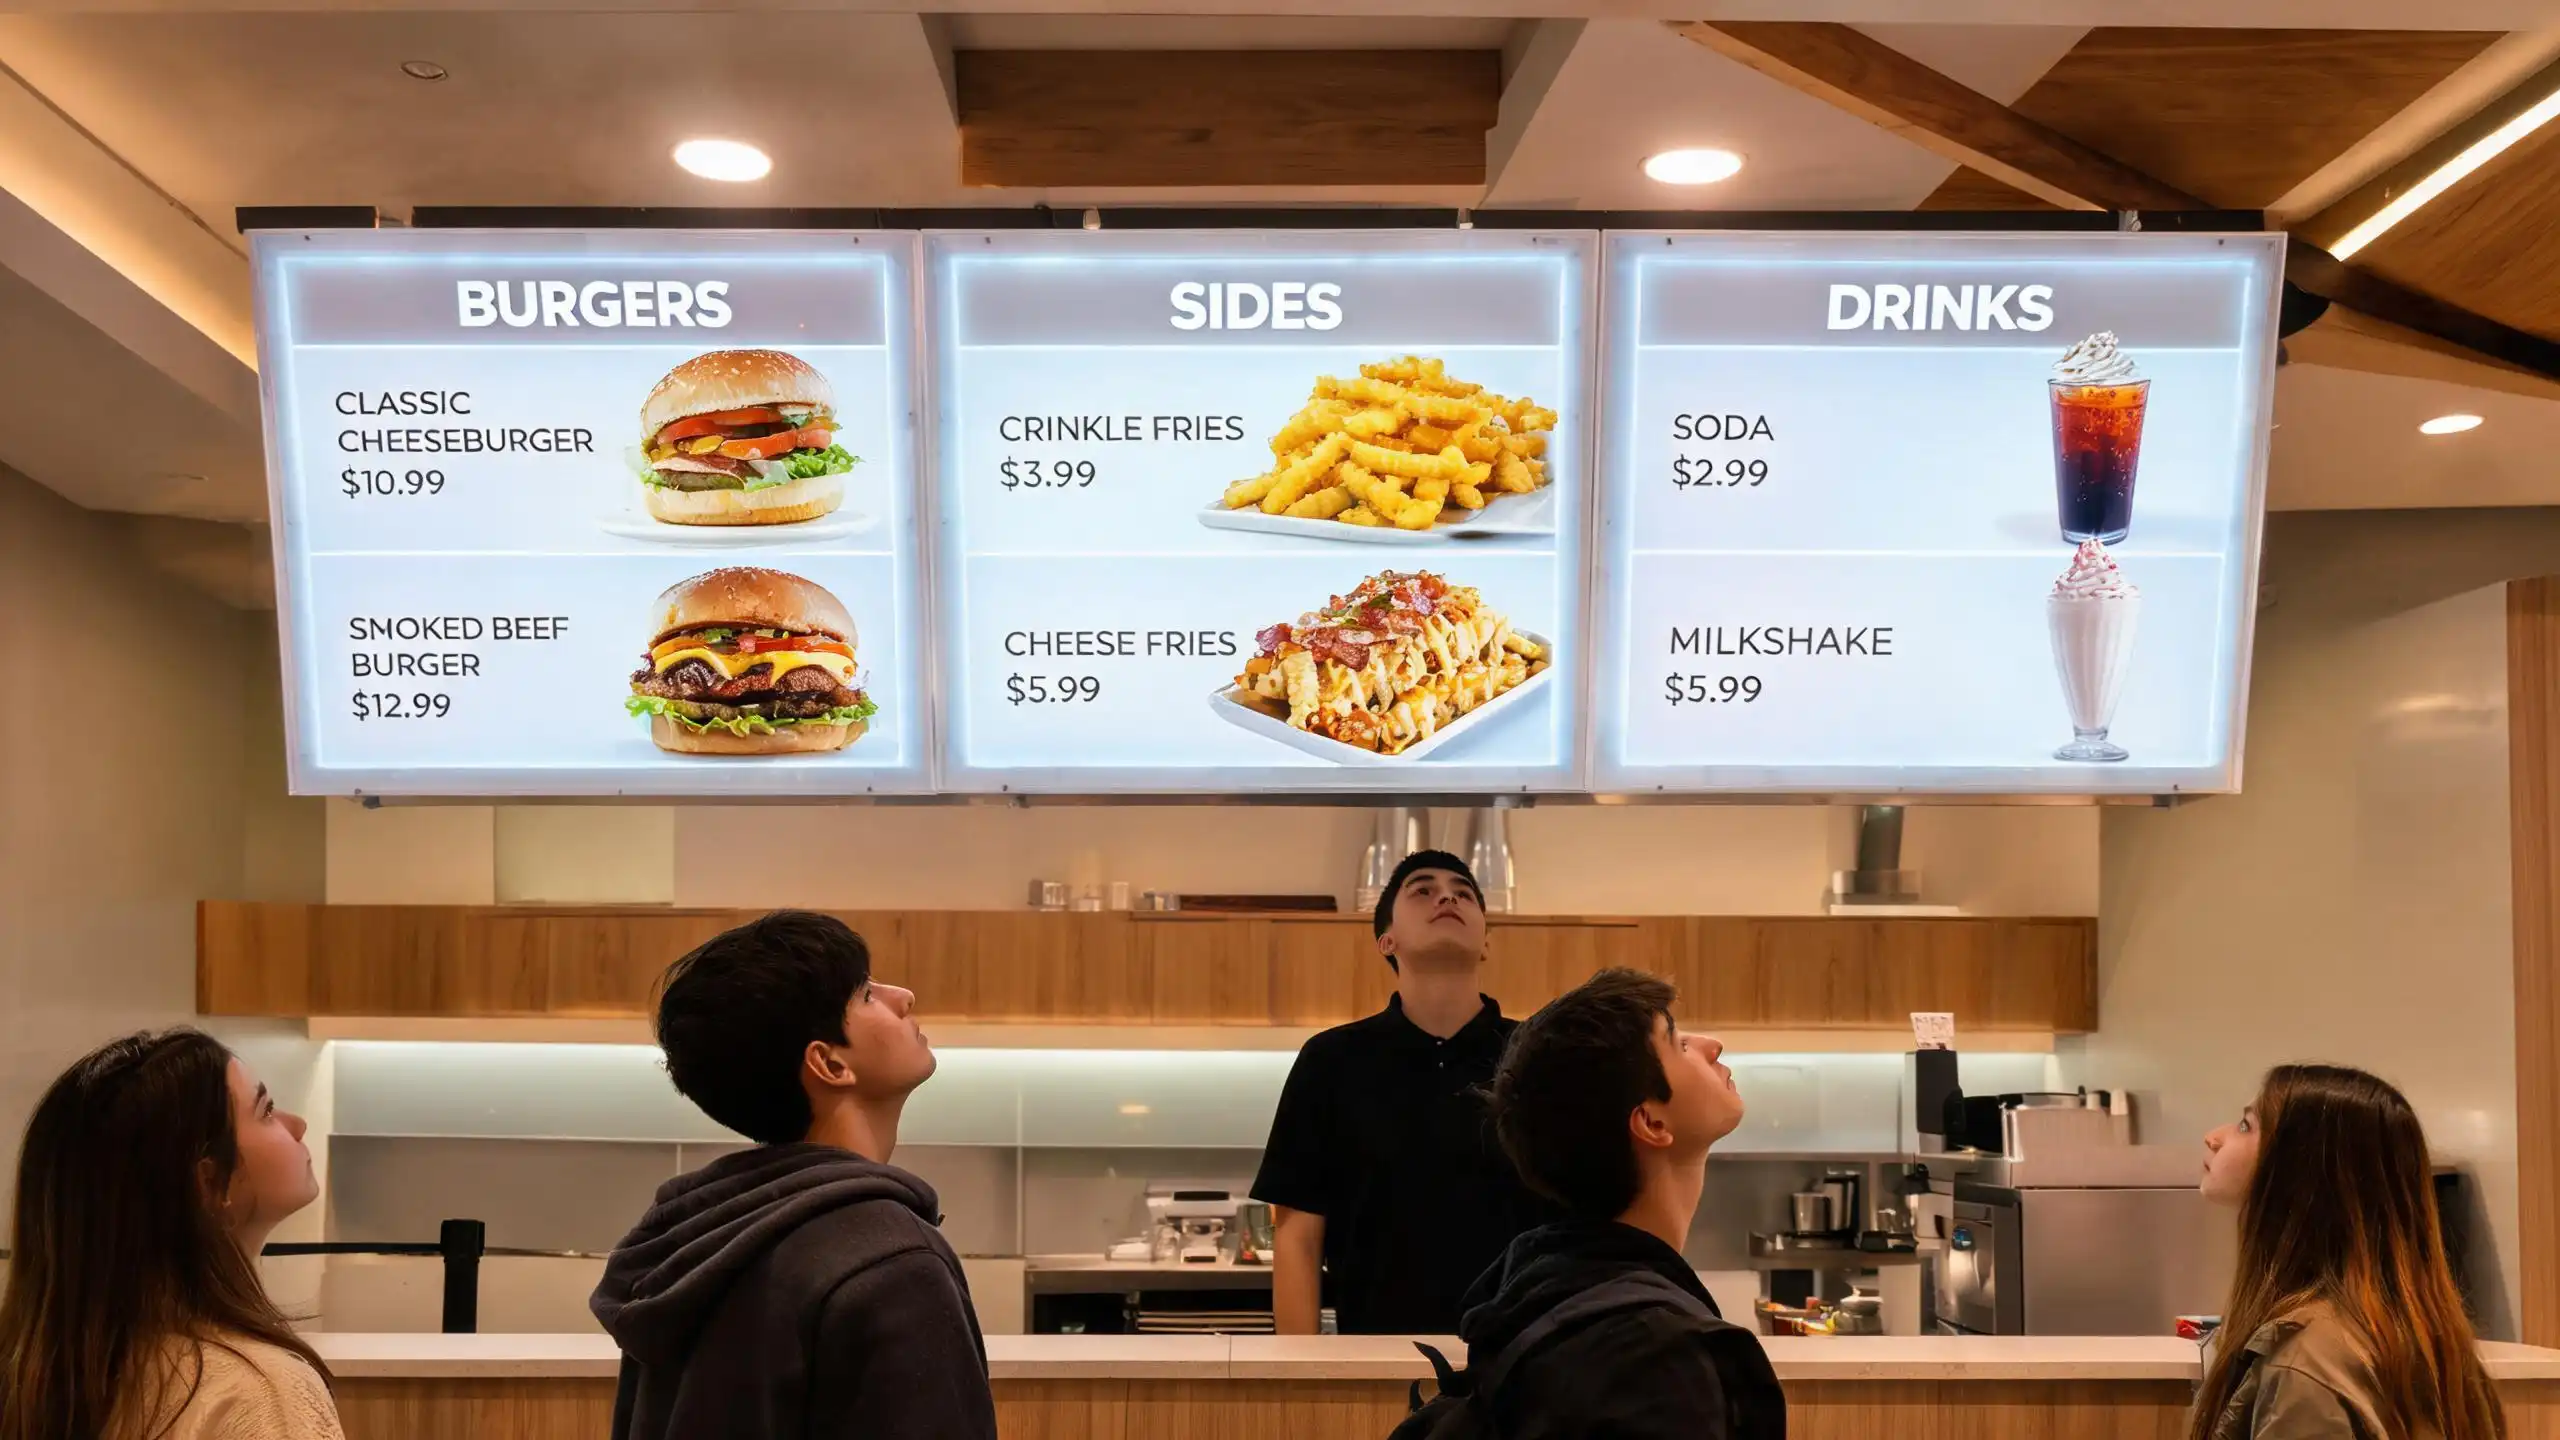
Setting: A fast-casual restaurant chain with 40 locations is standardizing its above-counter menu boards. Each board measures approximately 1.2m x 0.8m and displays the full menu — approximately 30 items with prices, descriptions, and food photography. Menus change seasonally (four times per year), so the content must be updatable without replacing the entire light box. The boards are mounted above the counter, roughly 2.5m from the floor, and must be readable from the back of a queue line approximately 4 meters away. The kitchen environment behind the counter produces grease-laden air and elevated humidity during peak cooking hours.
Challenge: Three competing constraints define this project. First, the updatable content requirement means the visible menu layer must be replaceable without disassembling the light box or rewiring the LEDs. Second, the grease and humidity from the kitchen will attack any non-sealed electronic component over time — unprotected LED strips corrode, and grease film on the acrylic panel dulls the light output. Third, the board must be bright enough to be read from 4 meters away by customers in a queue line, many of whom are glancing up while distracted by their phones or companions.
Options: A printed acrylic insert system — where the menu is printed on a translucent film that slots into the light box behind a clear acrylic face — would allow seasonal updates by swapping the printed insert. However, the insert channel could trap grease. A digital display would solve the updatable content problem elegantly and allow dynamic content, but the cost per location, the need for network connectivity, and the different visual character (a backlit LCD vs a light-diffused acrylic panel) were concerns for brand consistency. A magnetic overlay on backlit acrylic — where magnetic printed panels adhere to the face of a permanently backlit opal acrylic panel — offered updatable content and a sealed light box, but the magnetic overlays could be knocked off during cleaning.
Solution: The chosen solution was a backlit 5mm opal cast acrylic panel with a removable printed overlay system. The opal acrylic provides even, diffused backlighting across the full 1.2m x 0.8m surface, eliminating hotspots and ensuring uniform legibility. The menu content is printed on a translucent polyester film that slides into a front-loading frame — the frame hinge opens downward, the old insert slides out, the new one slides in, and the frame snaps closed. No tools are required for the swap, which takes under two minutes per board. The LED system uses IP65-rated SMD5630 strips mounted in a sealed aluminum channel behind the panel, with a gasketed back cover that prevents grease-laden air from reaching the electronics. The aluminum frame itself serves as a heat sink, managing the thermal output of the high-brightness strips. Color temperature was specified at neutral white (4000K) — warm enough to make food photography look appetizing, cool enough to keep text crisp and legible. The result is a system that delivers consistent brightness, survives the kitchen environment, and allows a single staff member to update all menu boards across a location in under 15 minutes per seasonal change.
Scenario 3: Trade Show Booth — Tech Startup at CES
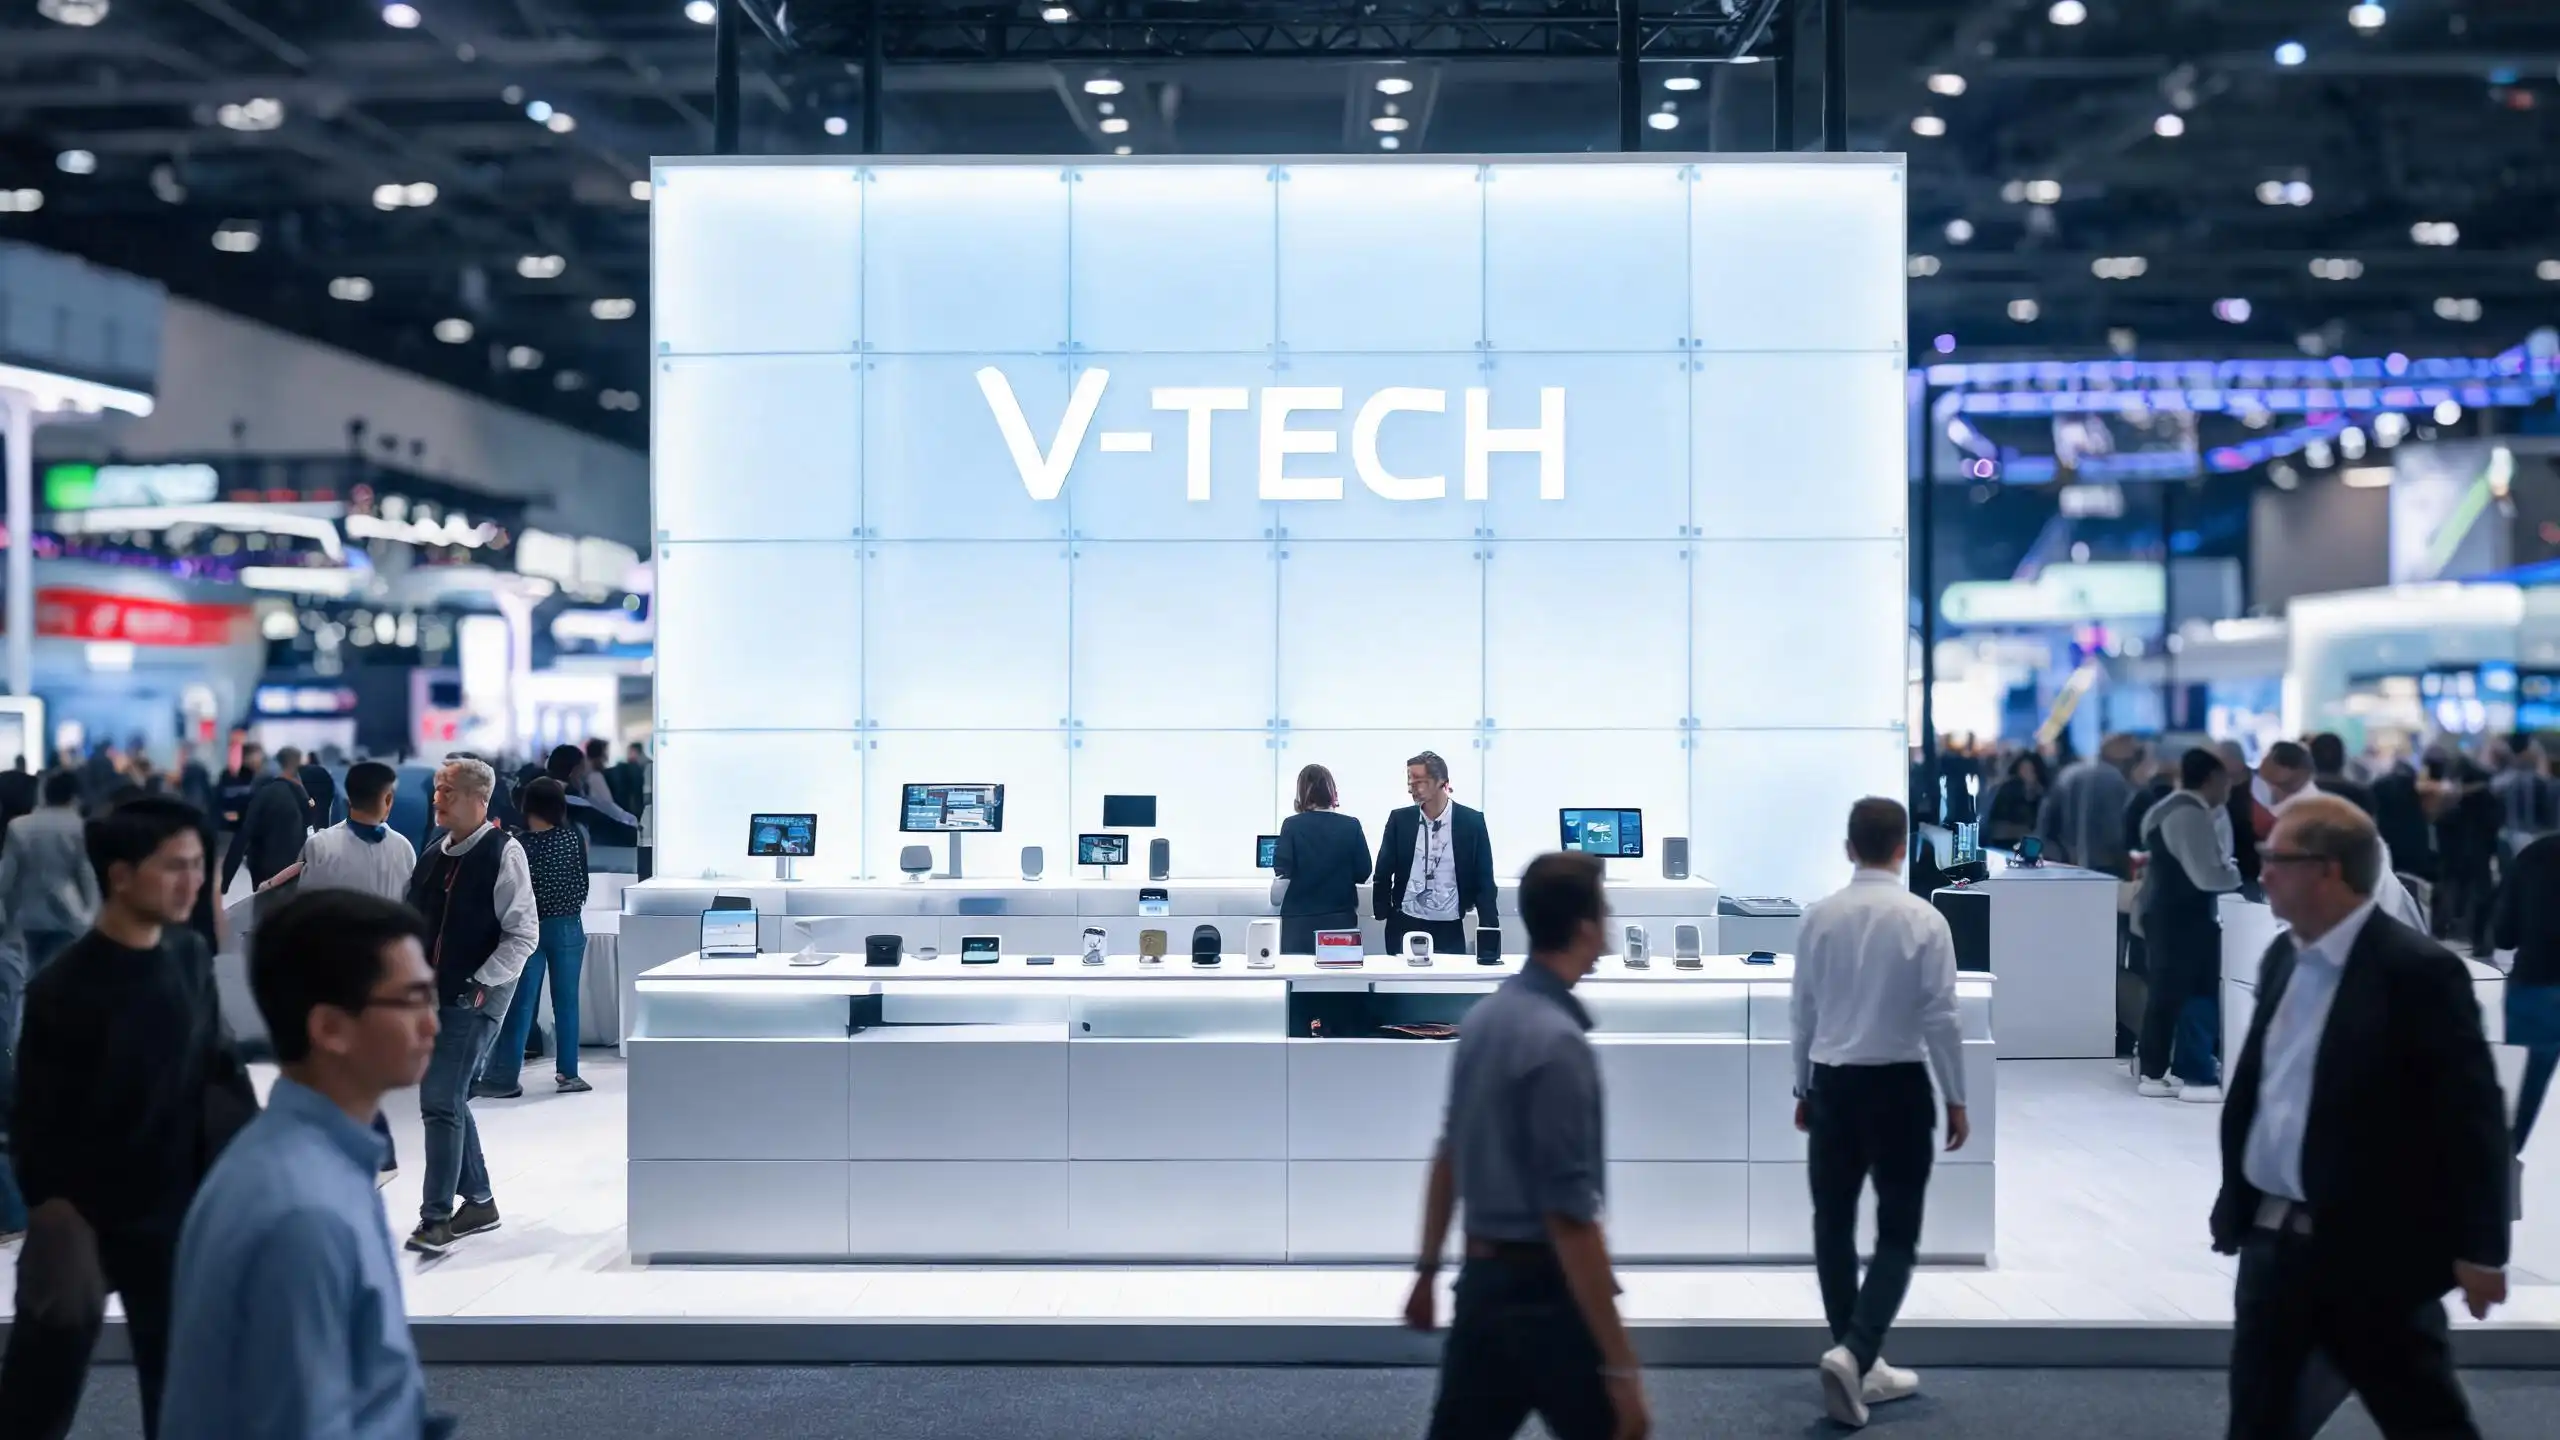
Setting: A tech startup is exhibiting at CES and needs a portable illuminated back wall sign measuring 2m x 1m. The sign must ship in standard wheeled shipping cases (checked as oversized baggage), assemble in under 30 minutes by two people without specialized tools, and run on a standard 110V outlet available at the booth. The sign must create visual impact from across a large exhibition hall — a space where hundreds of competing illuminated signs are all vying for attention.
Challenge: The constraints are severe and conflicting. Portability demands a sign that breaks down into small, packable components. Tool-free assembly rules out screwed or bolted connections. Standard 110V power means the LED system must run on low-voltage DC via an adapter, not hardwired AC. And visual impact in a hall full of illuminated signs requires a brightness and scale that typically comes from large, heavy, permanent installations.
Options: A SEG (silicone edge graphic) fabric light box is the trade show industry standard — it packs flat, assembles with a tool-free aluminum extrusion frame, and provides large-format illumination. However, the fabric face is not acrylic, and the client specifically wanted the premium look and light quality of an acrylic panel. A modular acrylic edge-lit panel system would deliver the acrylic aesthetic but needed to solve the portability and assembly challenges. An LED panel array — a grid of small LED modules behind a diffuser — would be bright and portable but lacks the premium material quality the brand wanted.
Solution: The final solution was a modular edge-lit acrylic panel system using four 1m x 0.5m panels of 10mm cast clear acrylic that connect edge-to-edge via magnetic hardware to form the full 2m x 1m sign. Each panel carries a section of the brand logo, laser-engraved and aligned so the logo reads continuously across the seams. The LED strips — SMD5050 cool white (6000K) for maximum exhibition-hall visibility — are integrated into the magnetic connectors, so when the panels snap together, the LED circuits connect automatically without any wiring step. The entire system runs on a single 12V adapter that plugs into the booth’s 110V outlet. Each panel is individually protected in foam-lined cases that fit within standard shipping dimensions. Two people can unpack, connect, and power up the full 2m x 1m illuminated sign in approximately 20 minutes, with no tools beyond their hands. The acrylic panels’ edges are diamond-polished to maximize light coupling from the connector-mounted LEDs, and the magnetic hardware is rated for the vibration and handling of repeated trade show use.
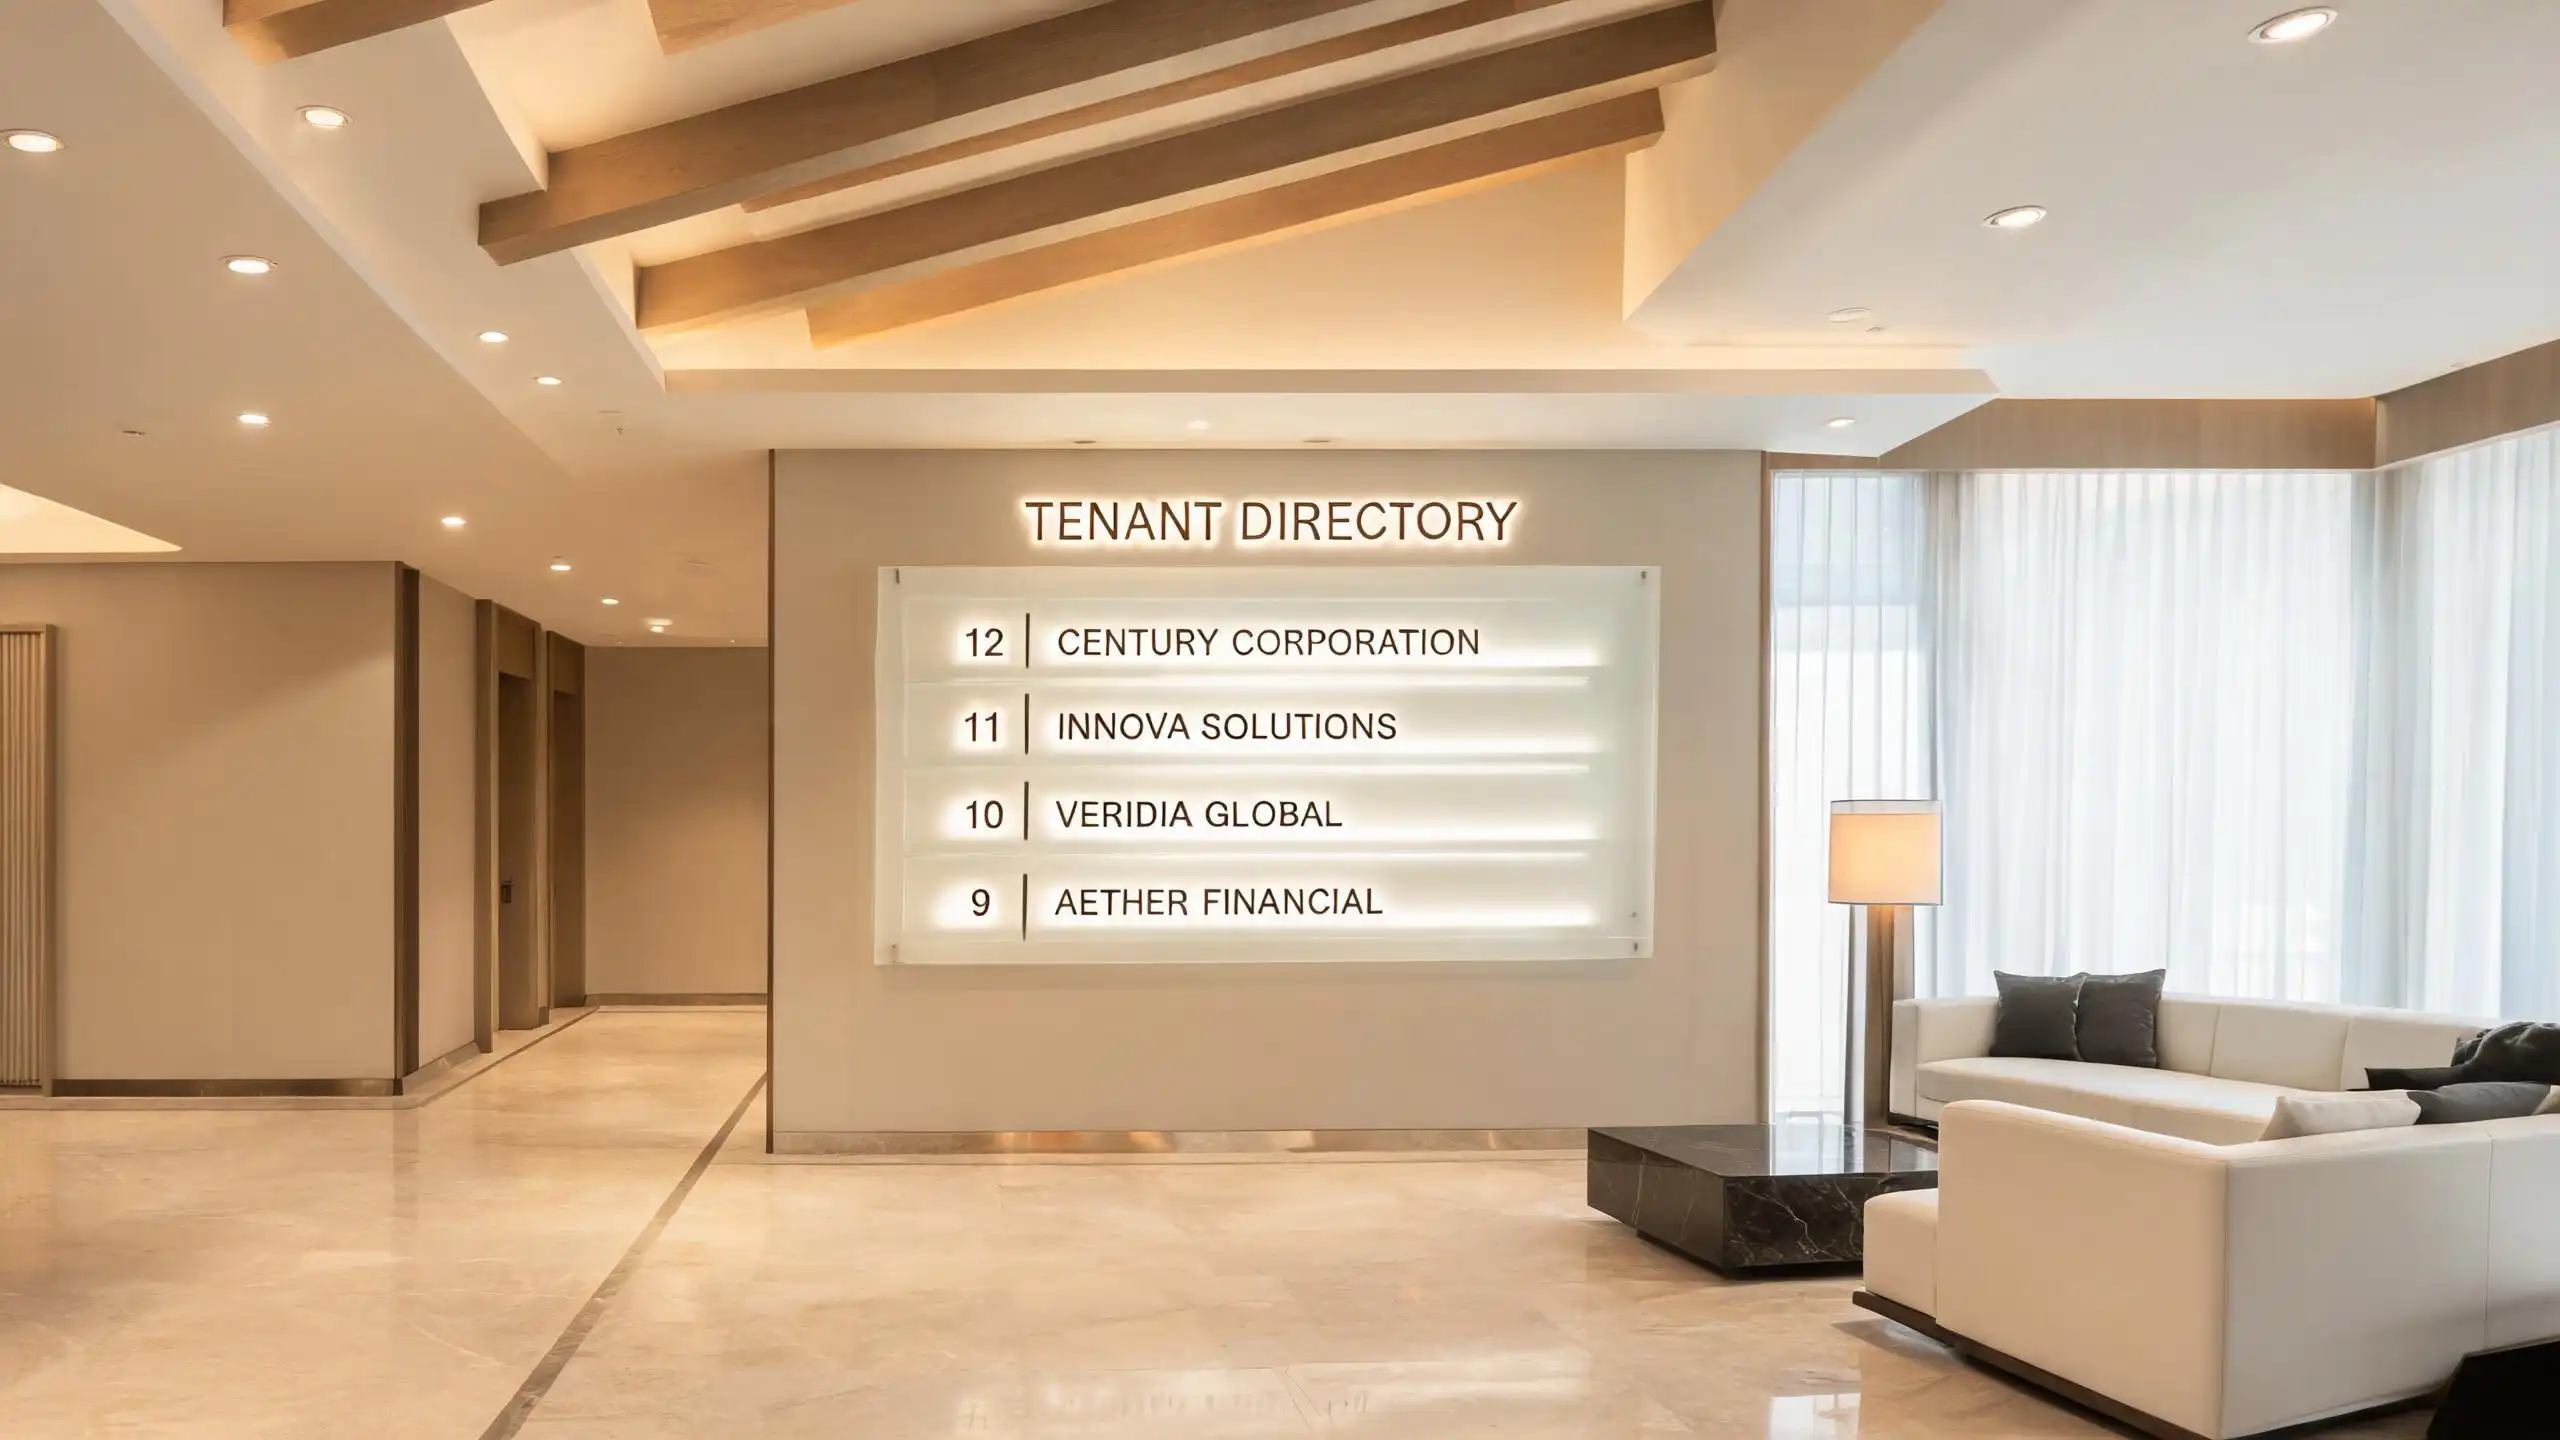
Scenario 4: Corporate Lobby Directory — Headquarters Tenant Signage
Setting: A corporate headquarters building lobby needs a wall-mounted directory sign showing approximately 25 tenant names and their corresponding floor numbers. The sign is the first thing visitors see when they enter the lobby, so it must communicate stability, quality, and permanence. The building owner wants the sign to last 10+ years without visible degradation — no yellowing, no LED failure, no faded printing. Individual tenant names change periodically (every few months), so the system must allow updating single name entries without replacing the entire sign.
Challenge: The long-term durability requirement is the hardest constraint. Acrylic can yellow over years of UV exposure, and LEDs can degrade or fail, but the sign must look as good in year 10 as it does on day one. The premium aesthetic requirement rules out utilitarian approaches — the sign must look like it belongs in a Class-A lobby, not a strip-mall directory. And the individual updatability requirement means each tenant entry must be an independently replaceable element, not a section of a single printed panel.
Options: An engraved backlit panel — a single opal acrylic panel with all tenant names engraved and backlit — would look premium and last, but updating a single name would require re-engraving or replacing the entire panel. Individual edge-lit letters mounted to a back panel would allow per-entry updates, but spelling out 25 company names in individual letters would be visually busy and expensive. A printed acrylic panel with replaceable inserts — where each tenant entry is a small printed acrylic tile that slots into the main panel — offered updatability but the tile system could look institutional rather than premium.
Solution: The selected approach was individual edge-lit cast acrylic letters mounted on a frosted acrylic back panel. Each tenant’s name is fabricated as a set of individually cut cast acrylic letters (typically 10mm thick, 75mm tall), each letter edge-lit by its own short LED segment. The letters are mounted to a large frosted acrylic back panel that is itself softly backlit by a low-brightness LED array, creating a subtle ambient glow behind the letters that fills the lobby with a warm, diffused light. Each letter (or set of letters for a tenant name) is independently mounted and wired, so when a tenant changes, only that name’s letters are removed and replaced — the back panel, the LED system, and all other entries remain untouched. The color temperature was specified at warm white (3000K) to create a premium, inviting atmosphere that reads as architectural lighting rather than commercial signage. The acrylic used is a UV-stabilized cast grade specifically formulated for 10+ year outdoor-equivalent UV exposure without yellowing, and the LED system is over-specified (running at roughly 60% of rated current) to extend component life well beyond the standard 50,000-hour rating. The result is a directory that looks like a permanent architectural feature, updates quietly without disruption, and will still look pristine a decade after installation.
Design and Fabrication: From Concept to Installation
Transforming an acrylic light box concept into a finished, installed product involves a sequence of design and fabrication decisions. Each step — from file preparation to edge polishing to installation method — affects the final sign’s optical performance, durability, and visual quality. For a broader understanding of the design process, our custom acrylic display design guide covers the general workflow; this section focuses specifically on the considerations unique to LED-integrated light boxes.
Design File Preparation
Acrylic light box fabrication begins with vector artwork. All cutting, engraving, and routing paths must be defined in vector format — AI (Adobe Illustrator), EPS, or SVG files are the industry standard. Raster images (JPG, PNG) cannot directly drive a laser cutter or CNC router and must be traced or redrawn as vectors first. Key file preparation considerations include:
- Minimum line width for engraving: Laser engraving removes material by burning, and the minimum practical engraved line width is approximately 0.5mm. Lines finer than this may be inconsistent or invisible in the final illuminated sign. For text that will be edge-lit (engraved into a clear panel), the minimum recommended text height is 15mm — smaller text may not produce enough engraved surface area to scatter sufficient light for legibility.
- Text size recommendations: For backlit printed overlays, text should be at least 25mm tall for content readable from 2–3 meters (typical menu board distance) and at least 40mm for content readable from 5+ meters (storefront distance). For edge-lit engraved text, 15mm is the minimum practical size, but 20mm+ is recommended for optimal light output.
- Color separation: If the sign uses multiple LED colors or zones, the artwork must separate these as distinct layers so the fabricator can assign them to different LED channels and controllers.
- Kerning and spacing: Illuminated text requires more generous letter spacing than print text — light bleed between closely spaced letters can merge them visually. A minimum of 10–15% additional tracking is recommended for engraved edge-lit text.
Fabrication Methods for Light Boxes
The fabrication methods used to produce acrylic light box components each have specific strengths. Understanding these helps in specifying the right process for each part of the sign:
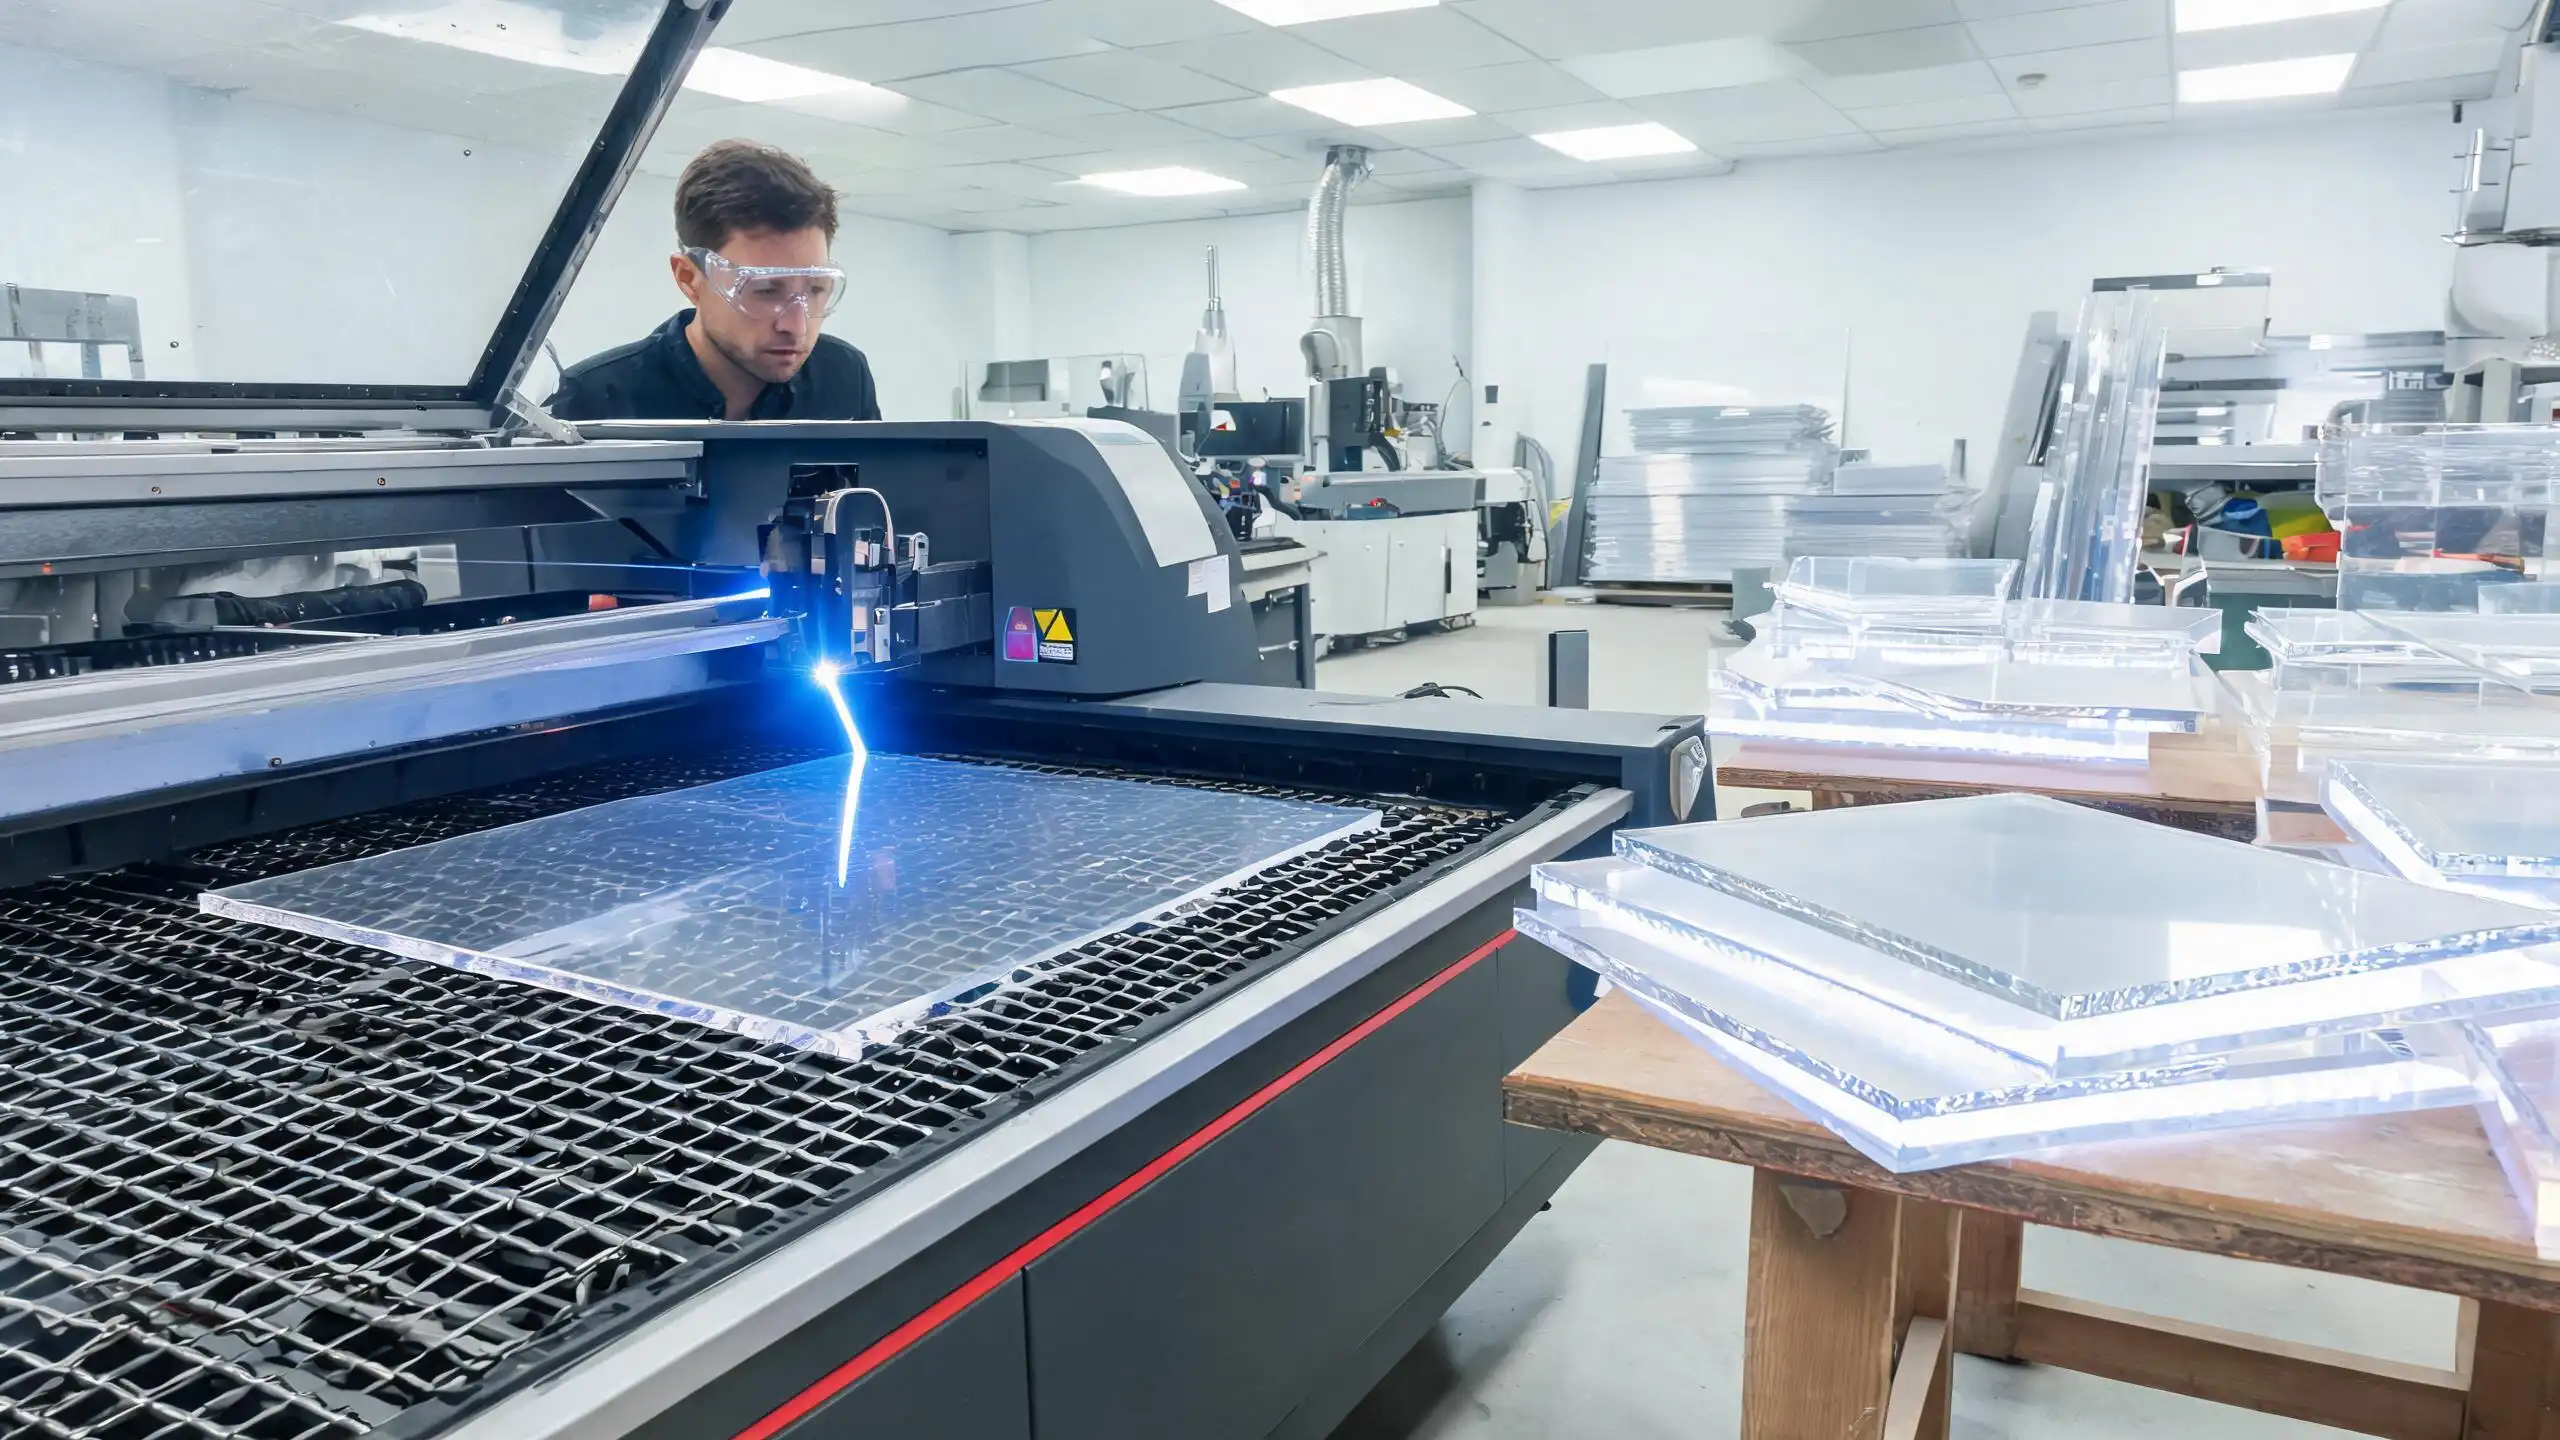
Laser cutting produces extremely clean, precise cuts in acrylic up to roughly 20mm thick. The laser melts and vaporizes the material at the cut line, producing an edge that is smooth and nearly polish-ready straight off the machine. Laser cutting is the standard method for cutting acrylic panels, letters, and complex shapes for light boxes. Tolerances of ±0.2mm are typical, making it suitable for signs with tight-fitting frames or interlocking components. For more detail on this process, see our guide on how to cut acrylic sheets.
CNC routing uses a rotating cutting bit to remove material and is used for thicker panels (over 20mm), 3D contouring, and producing routed channels for LED strips. CNC routing produces edges that require more finishing than laser cutting, but it can handle material thicknesses and geometries that lasers cannot — for example, routing a deep channel along the edge of a 25mm panel for an oversized LED strip.
Laser engraving is the process that makes edge-lit signs possible. By removing controlled amounts of material from the acrylic surface — typically 0.5mm to 2mm deep — the laser creates patterns that interrupt the total internal reflection of edge-entered light, causing it to scatter and become visible. Engraving depth, density, and pattern can be tuned to control brightness and uniformity — deeper engraving produces brighter output but weakens the panel structurally, so the depth must be balanced against the panel thickness.
Diamond polishing uses a precision rotating blade with diamond cutting edges to produce an optically clear edge on cast acrylic. This is the premium edge-finishing method for edge-lit signs because it maximizes the amount of light that couples from the LED strip into the panel. Diamond-polished edges have a glass-like clarity that flame polishing cannot quite match.
Edge Polishing: Flame Polish vs Diamond Polish
Flame polishing uses a directed flame to momentarily melt the acrylic edge, producing a smooth, glossy surface. It is faster and less expensive than diamond polishing and produces excellent results for cast acrylic. However, flame polishing can introduce micro-stress in the material that, over time and under UV exposure, can lead to crazing (fine surface cracks) — a concern for signs with long service lives.
Diamond polishing is a mechanical process that produces the clearest, most stress-free edge available. It is the recommended choice for edge-lit signs in premium or long-life applications, particularly those with 10+ year service expectations. The tradeoff is cost — diamond polishing is slower and more labor-intensive than flame polishing.
Assembly and Installation Considerations
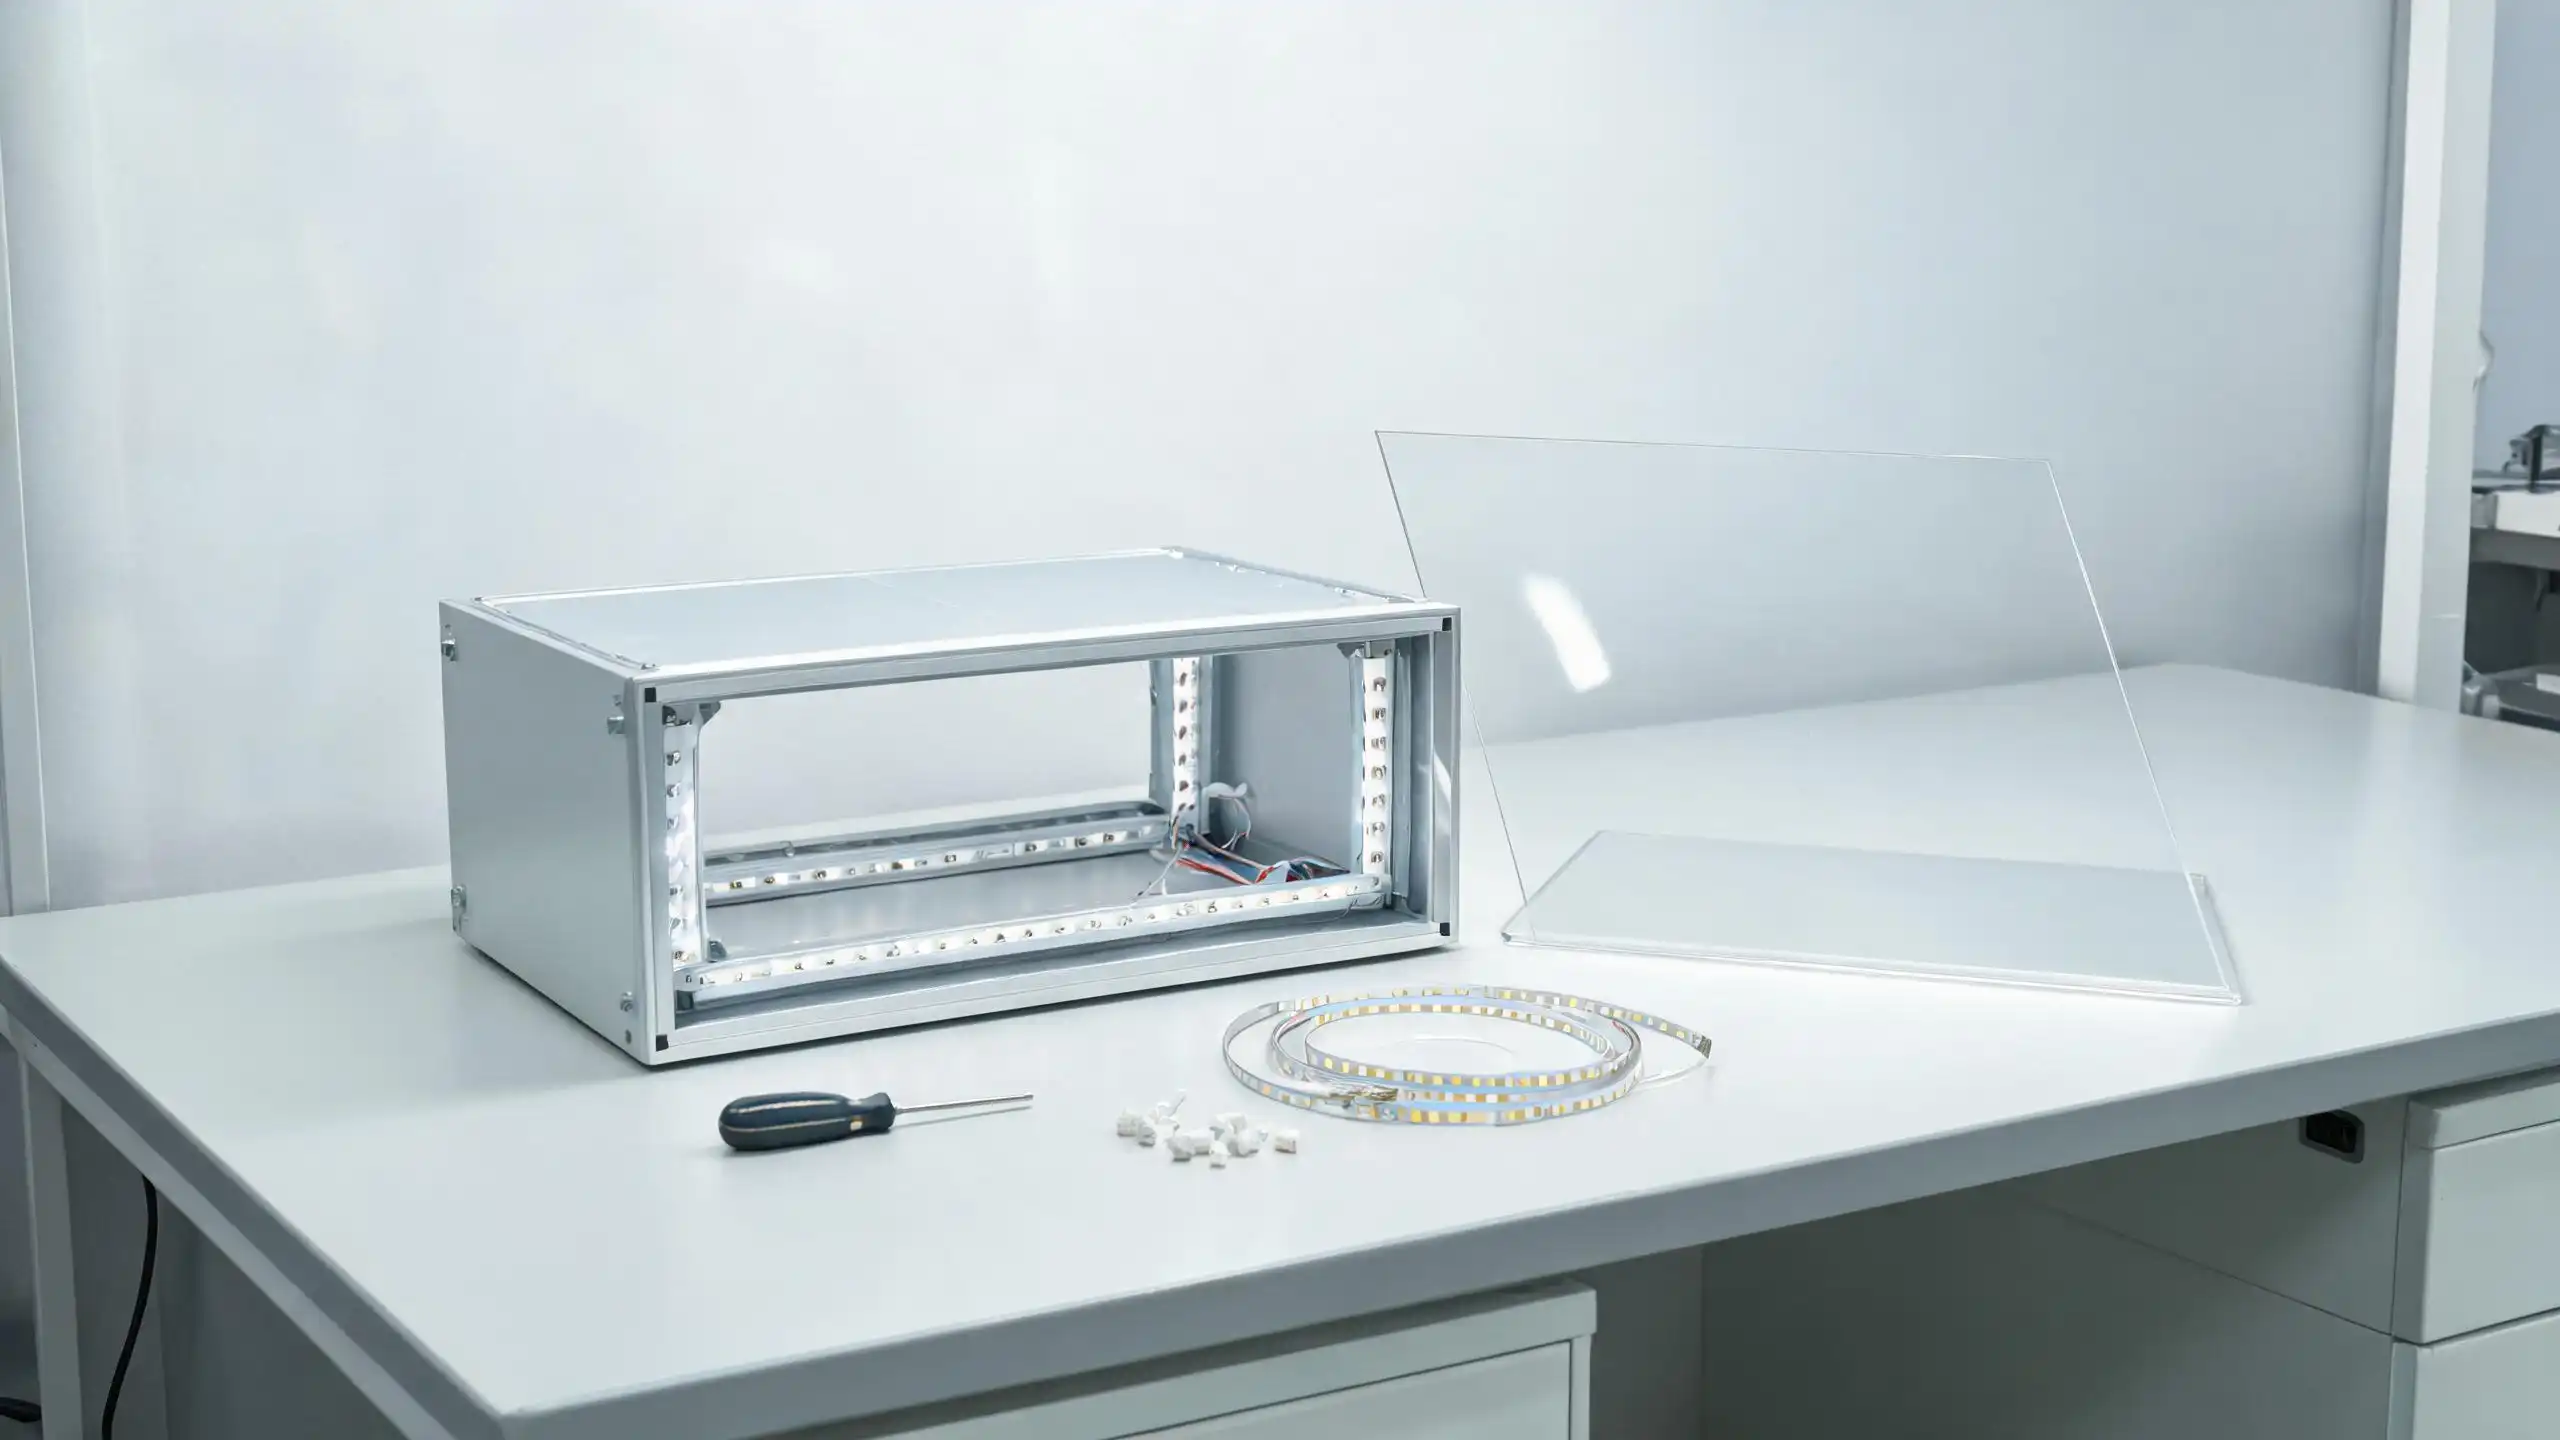
Light box assembly involves integrating the acrylic panel, LED system, frame, and wiring into a cohesive, serviceable unit. Key considerations include:
- Frame design: Aluminum extrusion is the standard frame material — it is lightweight, rigid, thermally conductive (helping dissipate LED heat), and available in profiles designed specifically for signage. The frame must grip the acrylic panel without pinching (which causes stress cracking) and must provide a channel or raceway for LED wiring.
- LED channel routing: For edge-lit signs, the channel that houses the LED strip must be precisely matched to the strip width and the panel thickness. The channel should be reflective (white or silver-coated) to redirect stray light back into the panel.
- Wire management: All wiring should be routed through channels or raceways in the frame — never free-floating inside the housing, where it can shift, chafe, or contact heat-generating components. Wire connections should use sealed connectors rated for the sign’s operating environment.
- Heat dissipation: LED strips in enclosed housings need a thermal management path. This can be passive (aluminum frame acting as a heat sink, ventilation slots in the housing) or active (small fans for high-output signs). Without adequate heat management, LEDs run hotter, degrade faster, and produce less light over time.
Installation methods vary by application. Wall-mounted signs use French cleats, Z-clips, or stand-off hardware that secures the sign to the wall while allowing it to be lifted off for service. Window-mounted signs use high-bond double-sided tape or suction-cup brackets for temporary or semi-permanent installations. Freestanding signs use bases or floor stands, often weighted for stability. Suspended signs use aircraft cable or architectural rods hung from ceiling structure — these require careful balancing and may need anti-sway tethers in seismic zones or high-traffic areas.
| Fabrication Method | Key Capabilities | Precision | Best For |
|---|---|---|---|
| Laser Cutting | 2D cutting, tight tolerances, clean edges, minimal finishing | ±0.2mm | Panel cutting, letters, complex shapes, frame components |
| CNC Routing | Thicker panels, 3D contouring, deep channel routing, pocketing | ±0.3mm | LED channels, thick panel fabrication, structural components |
| Laser Engraving | Surface pattern removal, controlled depth, light-guiding patterns | ±0.1mm depth | Edge-lit sign patterns, logos, text, decorative light features |
| Diamond Polishing | Optical-quality edge clarity, stress-free finish | Surface finish grade | Premium edge-lit panel edges, long-life installations |
| Flame Polishing | Fast, glossy edge finish, good for cast acrylic | Surface finish grade | Standard edge-lit signs, visible edges on backlit panels |
Maintenance and Longevity
An acrylic light box is a long-term investment, and proper maintenance ensures it continues performing at full brightness and visual quality for years. Understanding what can go wrong — and how to prevent it — is essential for facility managers and business owners responsible for sign upkeep.
LED Lifespan and Replacement
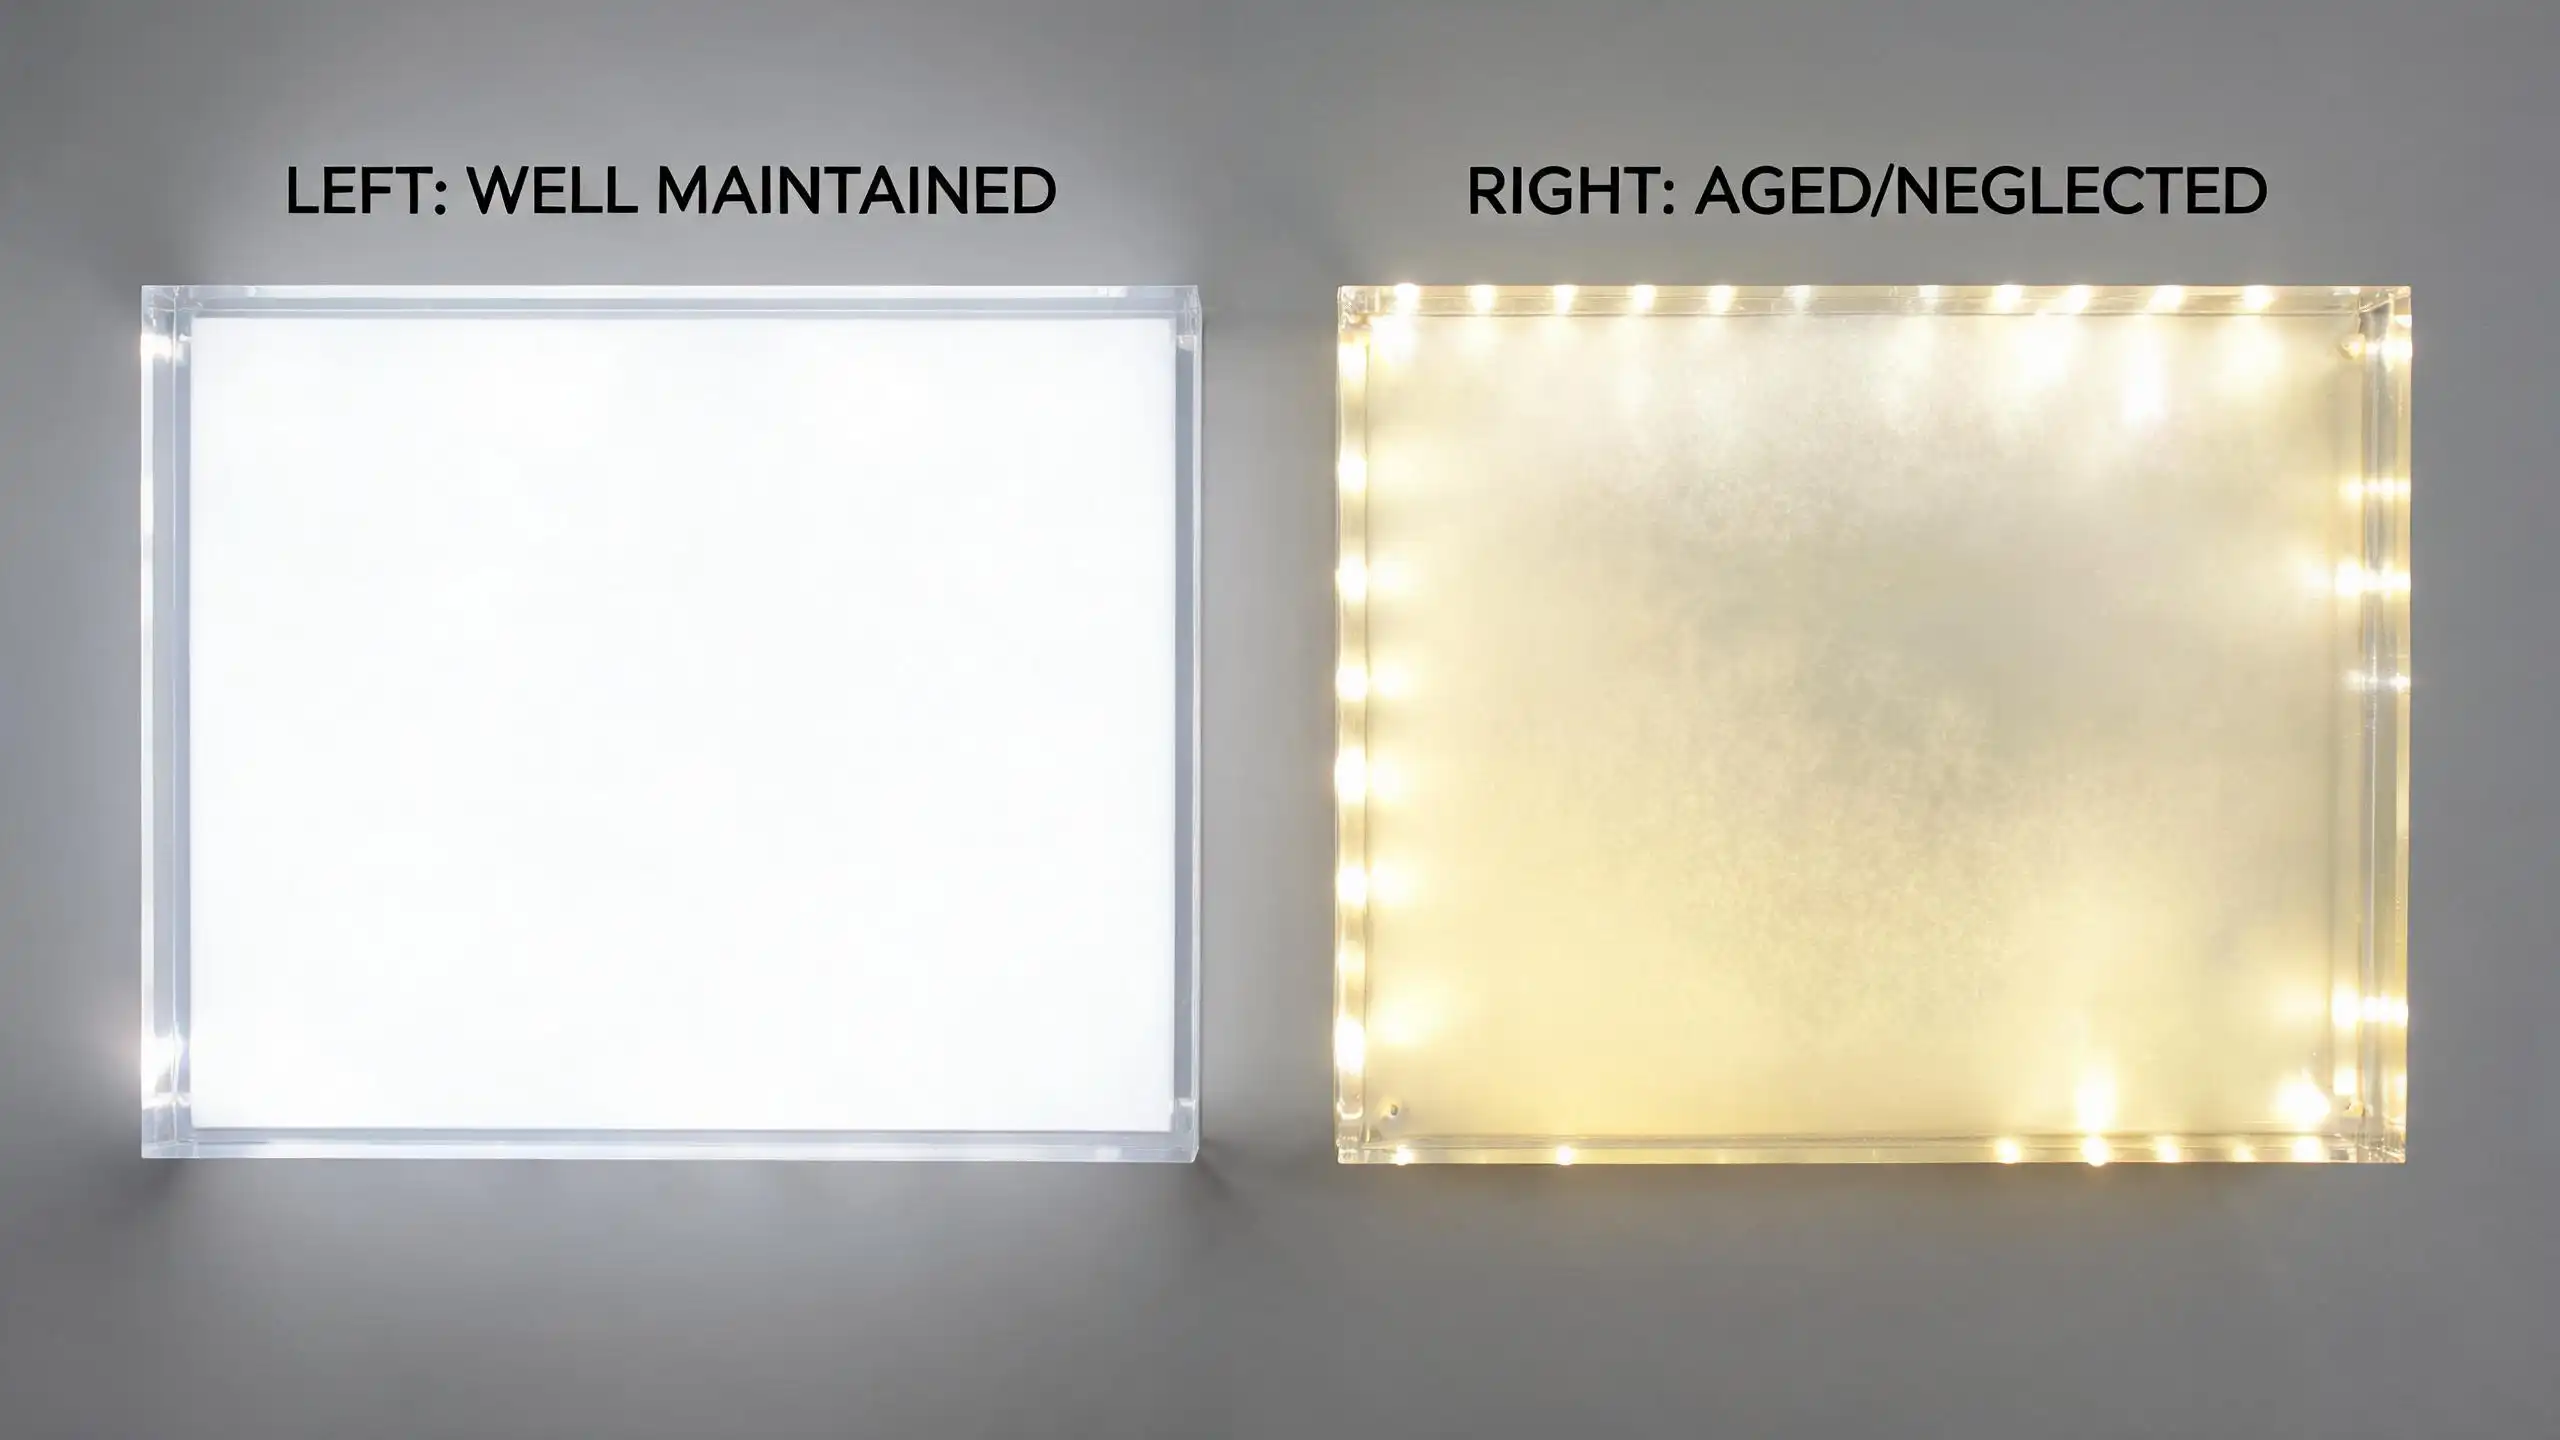
Quality LED strips in signage applications are rated for 50,000+ hours of operation, but “rated lifespan” refers to the point at which light output drops to 70% of original brightness (L70 standard) — not the point of total failure. A sign running 12 hours per day will reach L70 in approximately 11 years. Signs that run 24/7 will reach it in about 5.7 years. However, individual LED chips can fail prematurely due to manufacturing defects, power surges, or thermal stress. Signs with multiple LED strips or zones may show uneven illumination as individual strips degrade at different rates. When brightness drops noticeably or dark sections appear, the affected strip(s) should be replaced. Replacing LED strips in a well-designed light box is straightforward — the strips connect via plug-and-socket connectors and are accessible by removing the back panel or frame cover. Always replace with strips of the same type and color temperature to maintain uniform illumination.
Acrylic Panel Care
The acrylic panel is the most visible and most vulnerable component of the light box. Regular cleaning with a soft microfiber cloth and a mild soap-and-water solution or a dedicated acrylic cleaner will remove dust, fingerprints, and atmospheric residue that dull the surface. Never use ammonia-based glass cleaners (common window cleaners) — ammonia causes micro-cracking in acrylic over time, leading to crazing and eventual structural failure. Avoid abrasive pads, paper towels (which can scratch), and solvents like acetone or alcohol. For deeper cleaning or to remove minor scratches, acrylic polishing compounds can restore surface clarity — buffing with a fine-grade plastic polish and a soft cloth can remove hairline scratches without disassembling the sign. For signs with printed overlays or applied vinyl, clean only the exposed acrylic surface and avoid getting moisture behind any overlay edges.
Preventing Yellowing
Acrylic yellowing is caused primarily by UV exposure and heat. Signs installed near windows, in skylit spaces, or in environments with significant UV-emitting ambient light will yellow faster than signs in fully indoor, artificial-light-only settings. Using UV-stabilized acrylic grades — which contain UV absorbers that intercept damaging wavelengths before they degrade the polymer chains — can extend the clear life of the panel by years. Heat buildup is the second contributor to yellowing; LED strips running at high output in poorly ventilated housings can raise the panel temperature enough to accelerate polymer degradation over time. Proper housing ventilation, adequate heat sinking, and running LEDs at less than maximum rated current all help keep panel temperatures low and extend the acrylic’s optical life.
Common Issues and Prevention
Even well-designed light boxes can develop issues over time. The table below summarizes the most common problems, their root causes, and the design and maintenance practices that prevent them:
| Issue | Root Cause | Prevention |
|---|---|---|
| LED hotspots (bright spots near LED strip, dim center) | LED strip too close to panel face, inadequate light mixing distance | Ensure minimum LED-to-panel distance (equal to LED spacing); use opal acrylic for diffusion; add light-mixing gap in housing |
| Uneven illumination (dark patches or gradient across panel) | Insufficient LED density for panel size, single-edge lighting on large panel, degraded LED strip section | Match LED density to panel size; use multi-edge lighting for panels over 1m; inspect and replace degraded strips |
| Moisture ingress (fogging, corrosion, electrical shorts) | Unsealed housing, missing gaskets, thermal cycling drawing in humid air | Use gasketed housings for humid environments; add breather-desiccant vents; use IP-rated LED strips; seal all wire entry points |
| Acrylic yellowing (visible discoloration over time) | UV exposure, heat buildup from enclosed LEDs, non-UV-stabilized acrylic | Specify UV-stabilized acrylic grades; ensure adequate ventilation; run LEDs below maximum current |
| Edge cracking or crazing | Flame-polished edges under stress, UV exposure, frame pinching the panel | Use diamond-polished edges for long-life signs; ensure frame does not pinch panel; use UV-stabilized material; avoid over-tightening frame fasteners |
| LED color shift (white light becomes warm or dim) | LED phosphor degradation from heat, power supply voltage drift | Provide adequate heat dissipation; use quality constant-current LED drivers; replace strips when color shift exceeds acceptable tolerance |
Frequently Asked Questions
1. How long do LED acrylic light boxes last?
LED strips typically last 50,000+ hours — about 11 years at 12 hours per day — while UV-stabilized cast acrylic panels can last 10–15 years without significant yellowing or degradation.
2. Can I change the LED color in my acrylic light box after installation?
If your sign uses RGB or RGBW LED strips, you can change colors anytime via a controller. With single-color white strips, you would need to physically replace the LED strips to change color temperature.
3. What is the difference between edge-lit and backlit acrylic signs?
Edge-lit signs have LEDs along the panel edges and illuminate only engraved or frosted patterns, producing an ultra-thin profile. Backlit signs have LEDs behind an opal acrylic panel, providing even full-surface illumination in a thicker housing.
4. Can acrylic light boxes be used outdoors?
Yes — outdoor acrylic light boxes require UV-stabilized acrylic, IP65-rated LEDs, and gasketed sealed housings to withstand moisture, temperature swings, and sun exposure.
5. How do I clean an acrylic light box panel?
Use a soft microfiber cloth with mild soap and water or a dedicated acrylic cleaner. Never use ammonia-based glass cleaners, abrasives, or solvents — they scratch or damage the acrylic surface.
6. What thickness of acrylic do I need for a light box?
For edge-lit signs, use 5–8mm for panels under 1m and 10–12mm for larger sizes. For backlit signs, 3–5mm opal acrylic is standard, with 5–8mm for panels over 1.5m.
7. Can I replace just the acrylic panel without changing the LED system?
Yes — well-designed light boxes allow independent panel replacement. Just ensure the new panel matches the original thickness, acrylic type, edge finish, and dimensions.
Get Your Custom Acrylic Light Box Solution
Every business space presents a unique set of lighting conditions, spatial constraints, branding requirements, and longevity expectations — and the right acrylic light box is the one engineered specifically for those parameters. At CustomAcrylicPro, we custom-fabricate LED-lit acrylic signage to your exact specifications, from edge-lit storefront logos to backlit menu systems to modular trade show displays, with full control over material grade, panel thickness, LED type and color temperature, and fabrication method. Contact us for a free consultation and quote, and our team will help you specify the optimal acrylic light box design for your application.